Configure Azure Active Directory as SAML Identity Provider:
Add an enterprise application
To add an enterprise application to your tenant:
Sign in to your Azure Account through the Azure portal.
Select Azure Active Directory.
Select Enterprise applications.
Select New application.
- Select Create your own application.
Name the application, and Create.
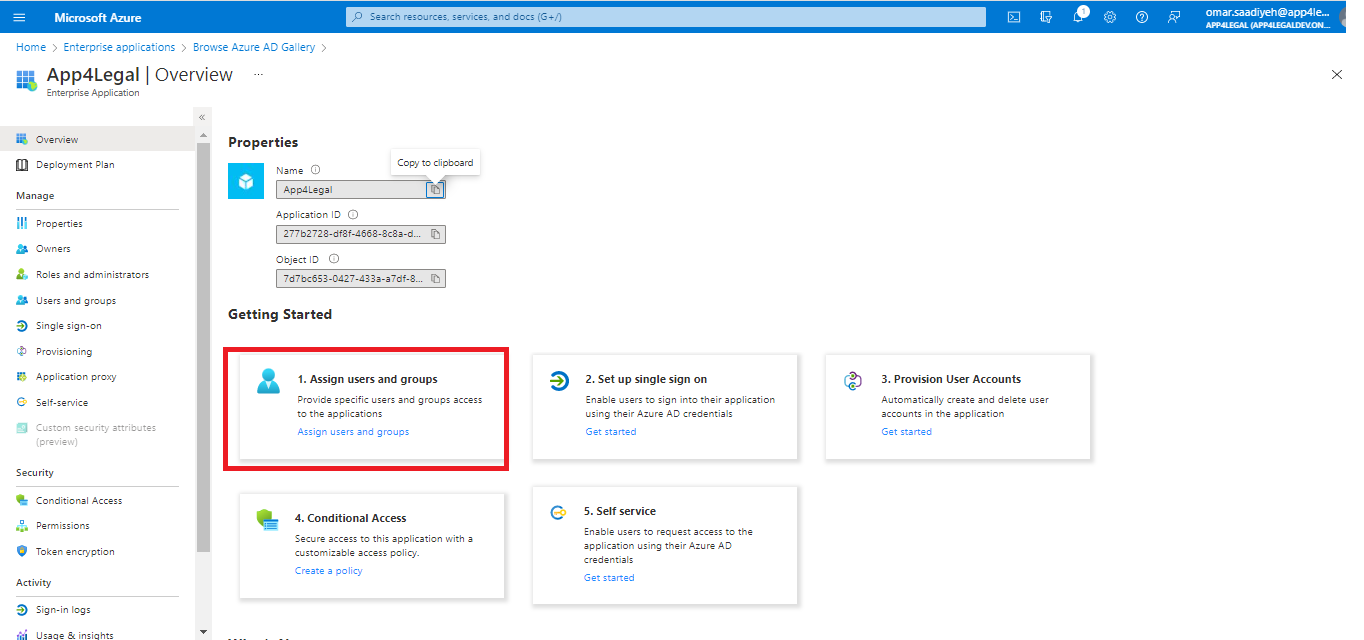
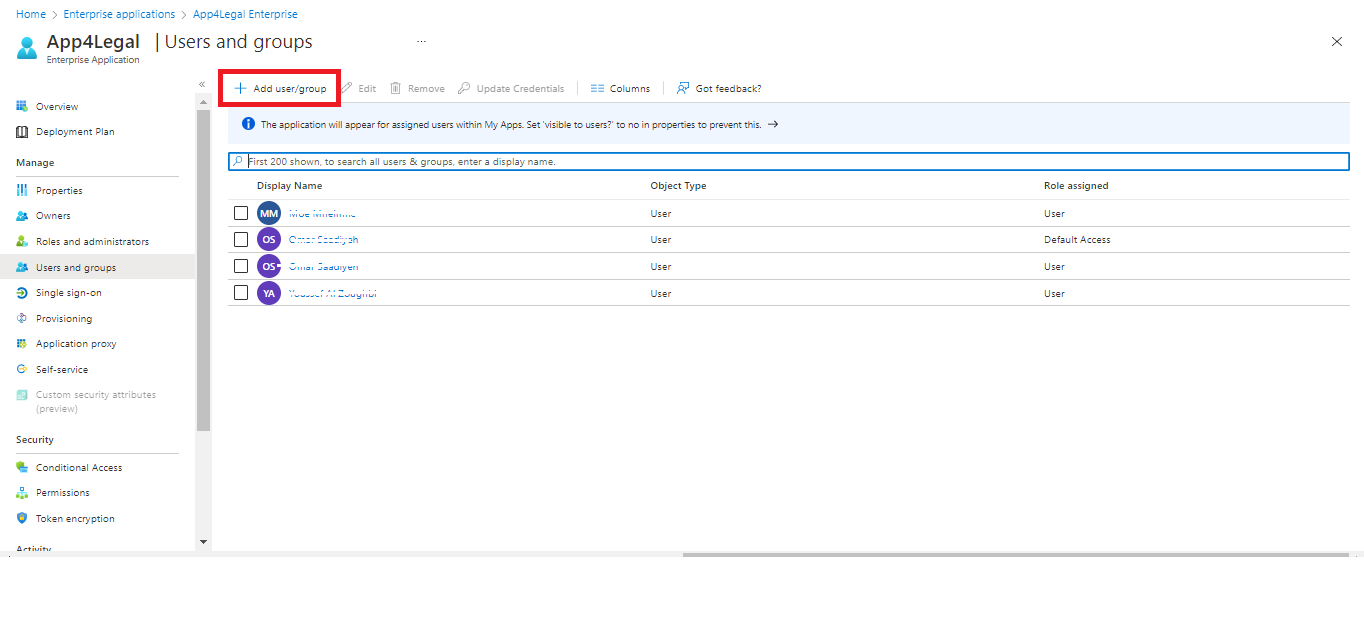
Assign users and groups
Only the assigned users/groups will be able to sign in to this application.
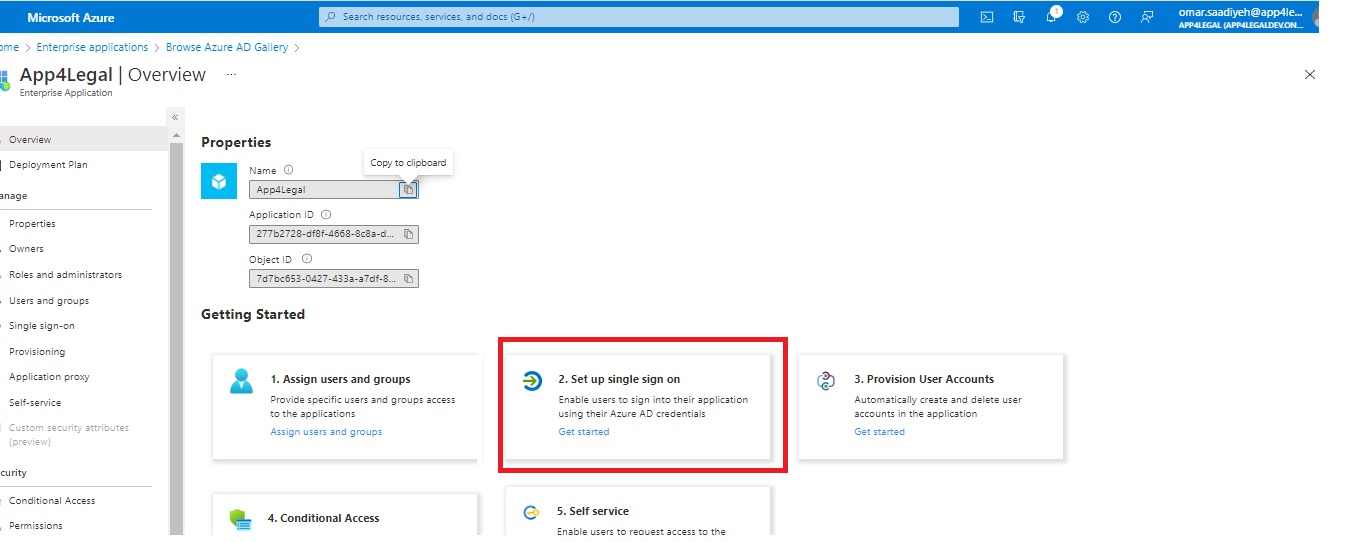
Setup Single sign-on
Basic SAML Configuration
- Select Edit.
- Setup the below and Save.
| Identifier (Entity ID) | |
| Reply URL (Assertion Consumer Service URL) | https://site.app4legal.com/xxxx/saml/www/module.php/saml/sp/saml2-acs.php/app4legal-azure_ad |
| Sign on URL | https://site.app4legal.com/xxxx/users/login_idps/azure_ad/ |
Obtain Federation Metadata XML
- Go to SAML Signing Certificate.
- Download Federation Metadata XML (to be imported as Metadata File at LEXZUR).
Obtain Client ID & Client Secret
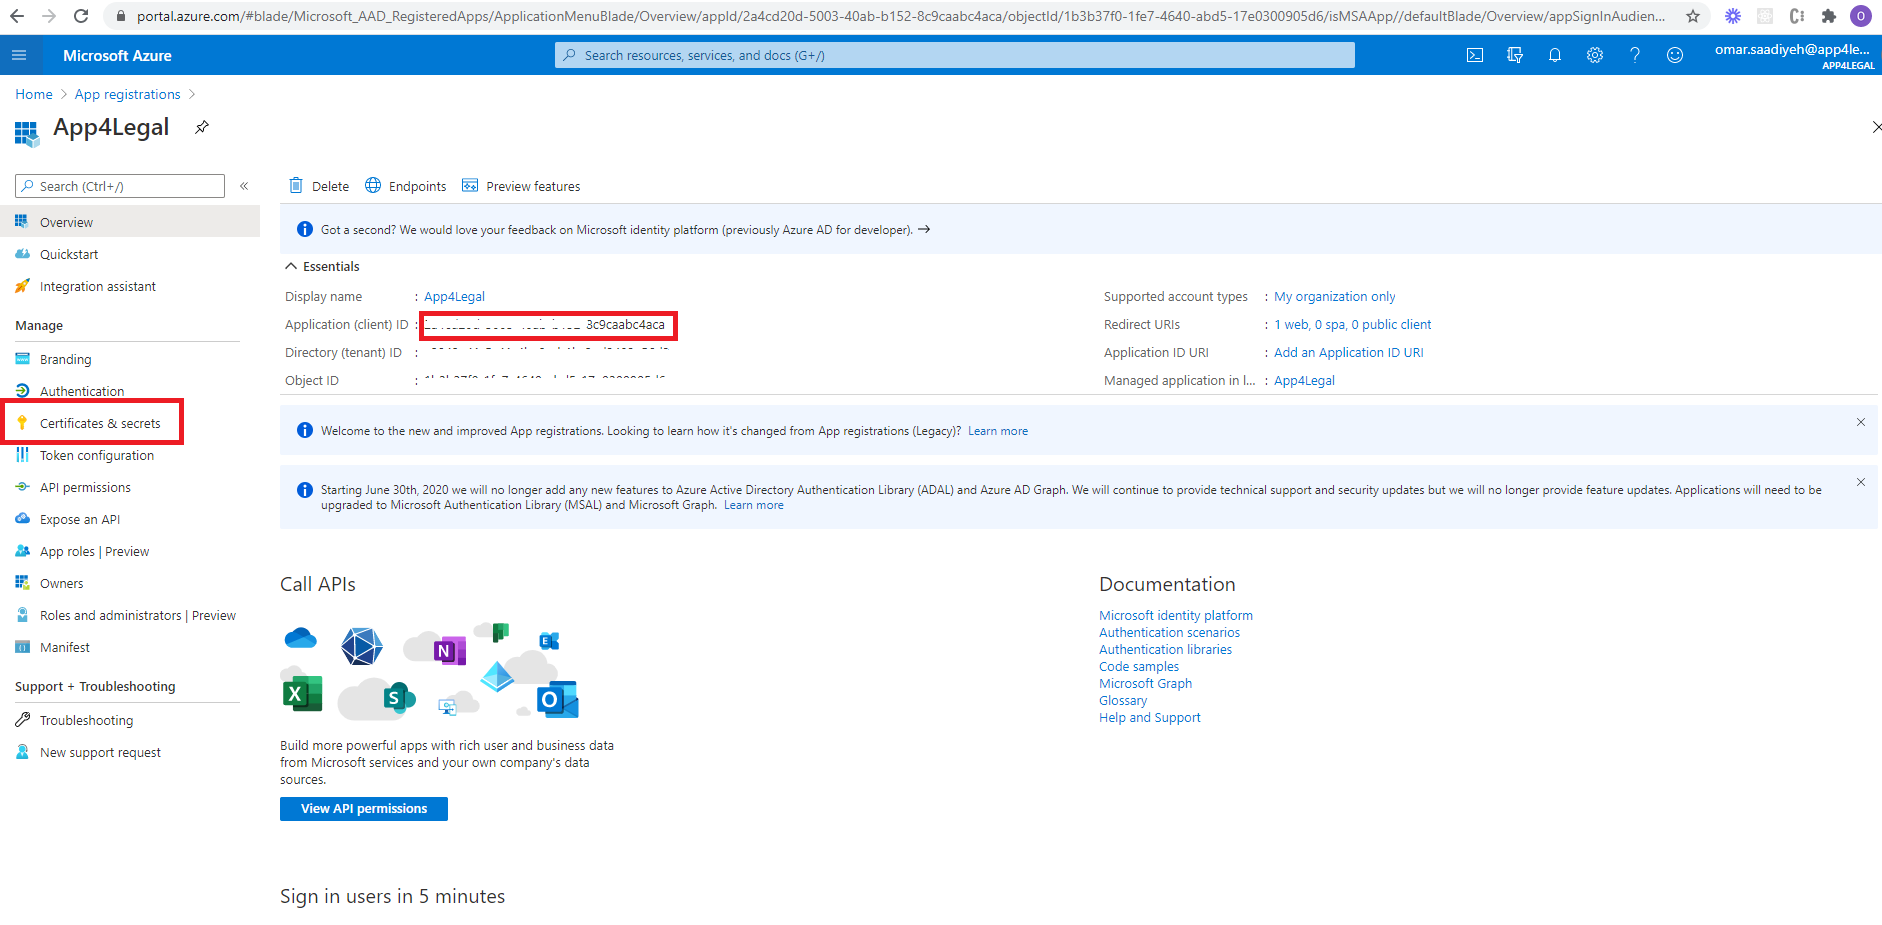
From App registrations in Azure AD, select your application.
- Select Overview.
- Copy Application (client) ID (to be pasted as Client ID at LEXZUR).
Select Certificates & secrets.
Select Client secrets → New client secret.
Provide a description of the secret, and a duration. When done, select Add.
After saving the client secret, the value of the client secret is displayed. Copy this value because you won't be able to retrieve the key later (to be pasted as Client Secret at LEXZUR).
Client Secret
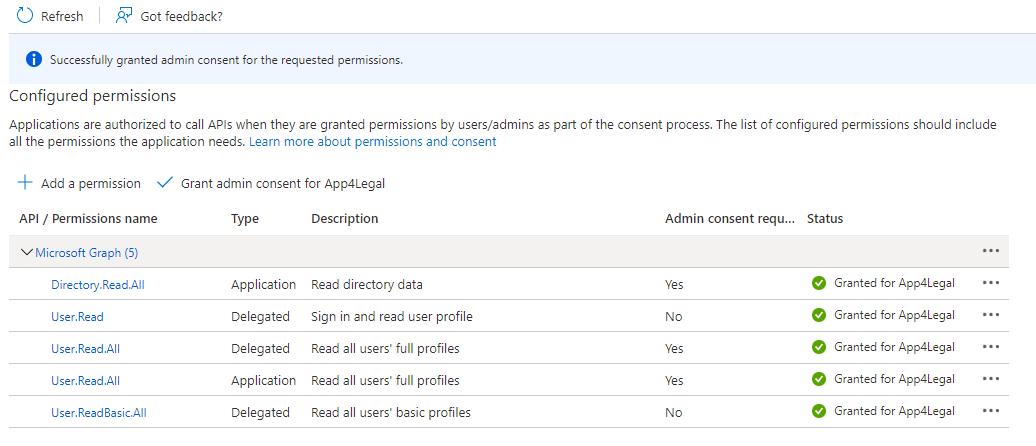
API Permissions
Select API Permissions.
Select Add a permission → Microsoft Graph.
- Add the Following Permission.
- Don't forget to grant admin consent for these permissions.
Configure LEXZUR as SAML Service Provider
Enable SSO in LEXZUR
Sign in to your LEXZUR instance LEXZUR.
Go to the Settings → Single Sign On →Setup .
- Select Azure Active Directory
- Paste Client ID & Client Secret (copied before from Azure AD).
- Upload (downloaded before from Azure AD).
- Click Save
Import Users from Azure AD to LEXZUR
- Go to the Settings → Users & Permissions →Import Users from Azure Active Directory.
- Look up the users and choose the appropriate User Group.



This page has no comments.