Objectives
- Choose Digital Signature
- Add Signees (specify the list of signees, type, order, etc...)
- Sign the contract
Steps
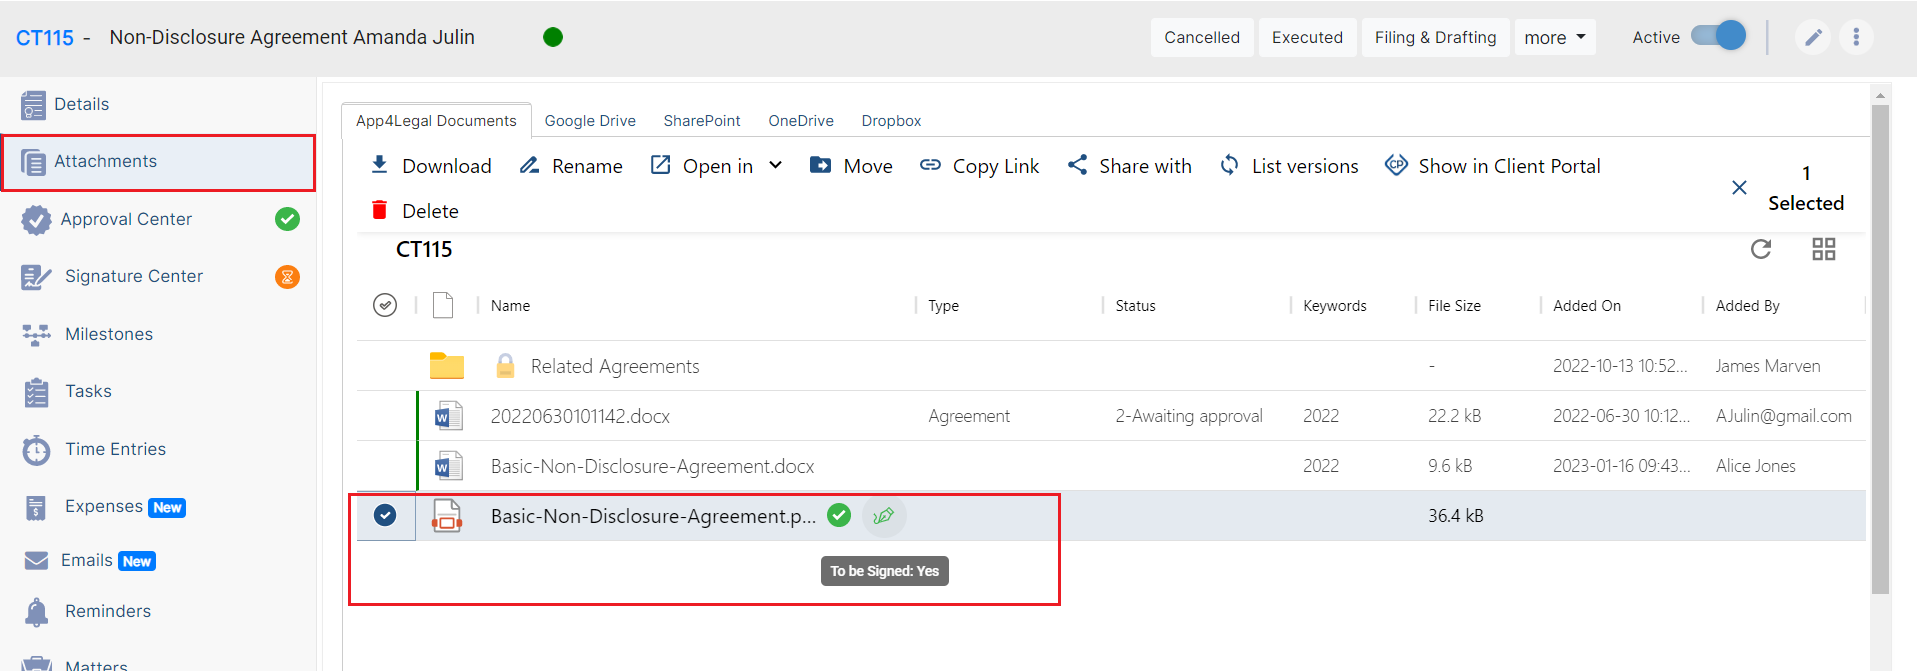
After the Approval is done, your contract is now ready to be signed. Just make
| Note |
|---|
Make sure to |
...
change the |
...
"to be signed" status of the contract document from the Attachments tab to "yes". |
| Tip |
|---|
The Signature Center can be configured based on your business criteria and contract types. Learn more here. |
However, admins predefined business rules from the system settings. However, users can add signees manually from the Signature Center of each contract.
You can use DocuSign, Adobe Sign, Emdha, Sirar, Lexzur Sign, or any other digital signature workflow available in Lexzur.
| Note |
|---|
| To add signature workflows, visit the Lexzur Marketplace, where you can select and install the apps you need, making them available in the signature center under contracts. |
Lexzur offers two internal signature options:
1. Lexzur Sign: Lexzur's native signature solution.
2. Lexzur Sign Pro: Powered by Adobe Acrobat Sign, allowing you to use Adobe Sign features without needing an Adobe account. Simply purchase the Adobe bundles within Lexzur.
Click Get Started on the workflow you selected.
Click on Add/Edit Signees Add Signee to add a new one :
You have two mandatory fields: Label and Signature Order.
- Label: Select the Approval label
- Signees: Specify the User(s) or Collaborator(s) which are authorized to sign the specific Contract with Signature Orders.
- Users Groups: Specify the User Group(s) which are authorized to sign the specific Contract with Signature Orders.
- Select if the signee is the manager of the requester or not
- Select the Board member and the Shareholder required from your contract party.
- Signature Order
Signees can sign either internally through the system, or using DocuSign.
You have also a section for the Signature History, you can see the action done, the changes, the date and time, and comments. You can from the action wheel export them to excel.
Please note that DocuSign integration needs to be configured: https://documentation.app4legal.com/display/A4L/Docusign+Integration
or edit the existing signees.
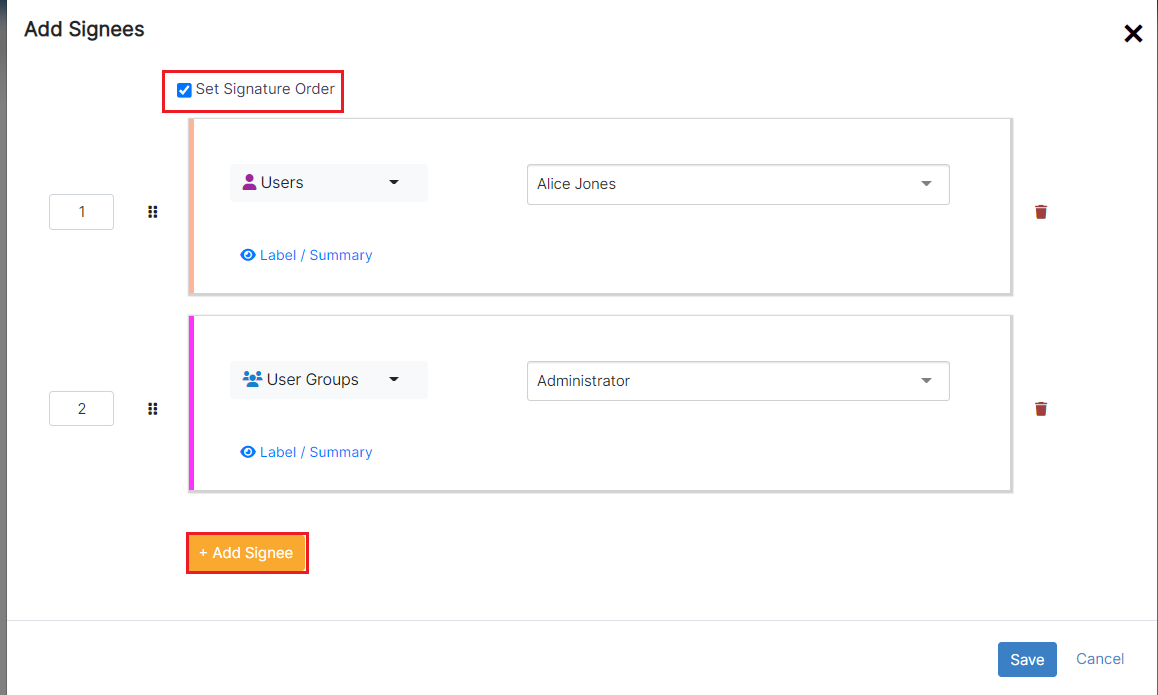
When adding a new signee, you can:
- Set the Signature Order by just clicking on the checkbox
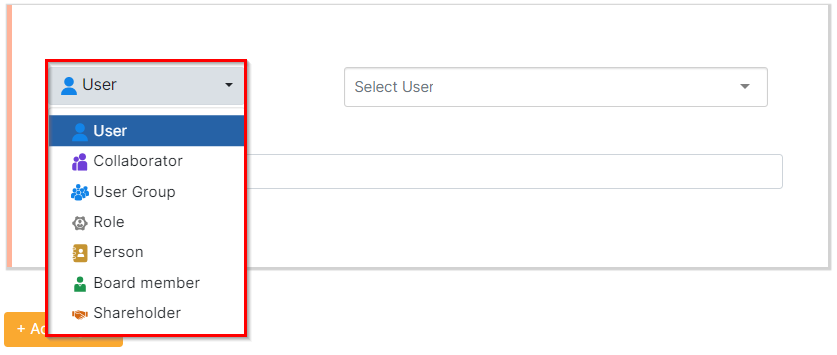
- Choose the Signee Type, defining the category of individuals authorized to sign the contract. This can include Users, Collaborators, User Groups, Roles, Requesters etc...
- Specify the Label/Summary of each signee.
- Add Multiple Signees.
Signees can belong to various categories:
1. Users: Licensed users actively using Contra can directly sign within Lexzur.
2. User Groups: This encompasses groups where any member has permission to sign.
3. Collaborators: Stakeholders associated with the contract, having access to it through the client portal for signature.
4. Roles: Roles can be defined based on client portal users, managers, and job titles. Learn how to configure roles here.
5. Person: Any external person saved in the Persons Module.
7. Board Members and Shareholders: This identifies individuals related to board members and shareholders of the parties involved. However, this requires a collaborator license, and signature will be conducted from the client portal.
Signees will then sign depending on the selected signature workflow.
Once signed, the contract is saved and can be retrieved easily.
| Warning |
|---|
To use DocuSign and Adobe Signature, or any Digital Signatures you have to set up their integration with LEXZUR Contra. Learn more here |
For more information about LEXZURFor more information about App4Legal, kindly reach out to us at help@app4legalhelp@lexzur.com.
Thank you!


