Objectives
Steps
In the Billing Module, you can manage various types of expenses, such as court fees, expert fees, translation costs, and more.
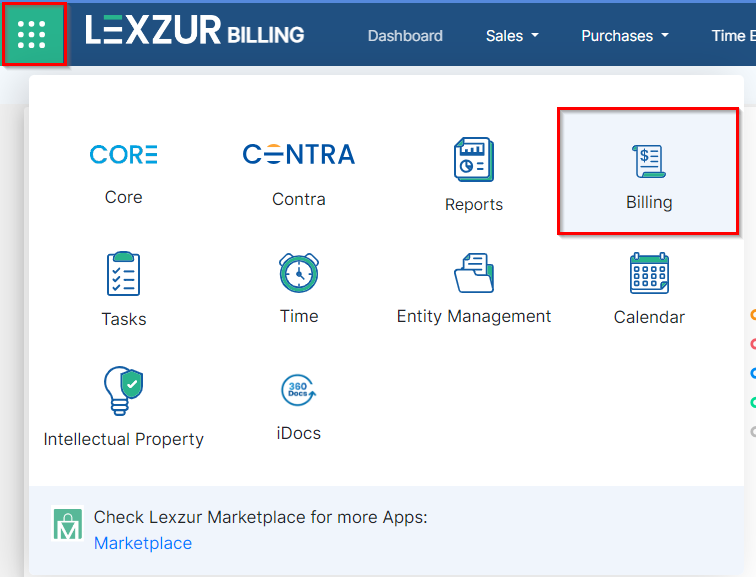
- Open the Billing Module
- Click on Purchases→ Expenses, and choose the option you need.
Adding a New Expense:
To record an expense, follow these steps:
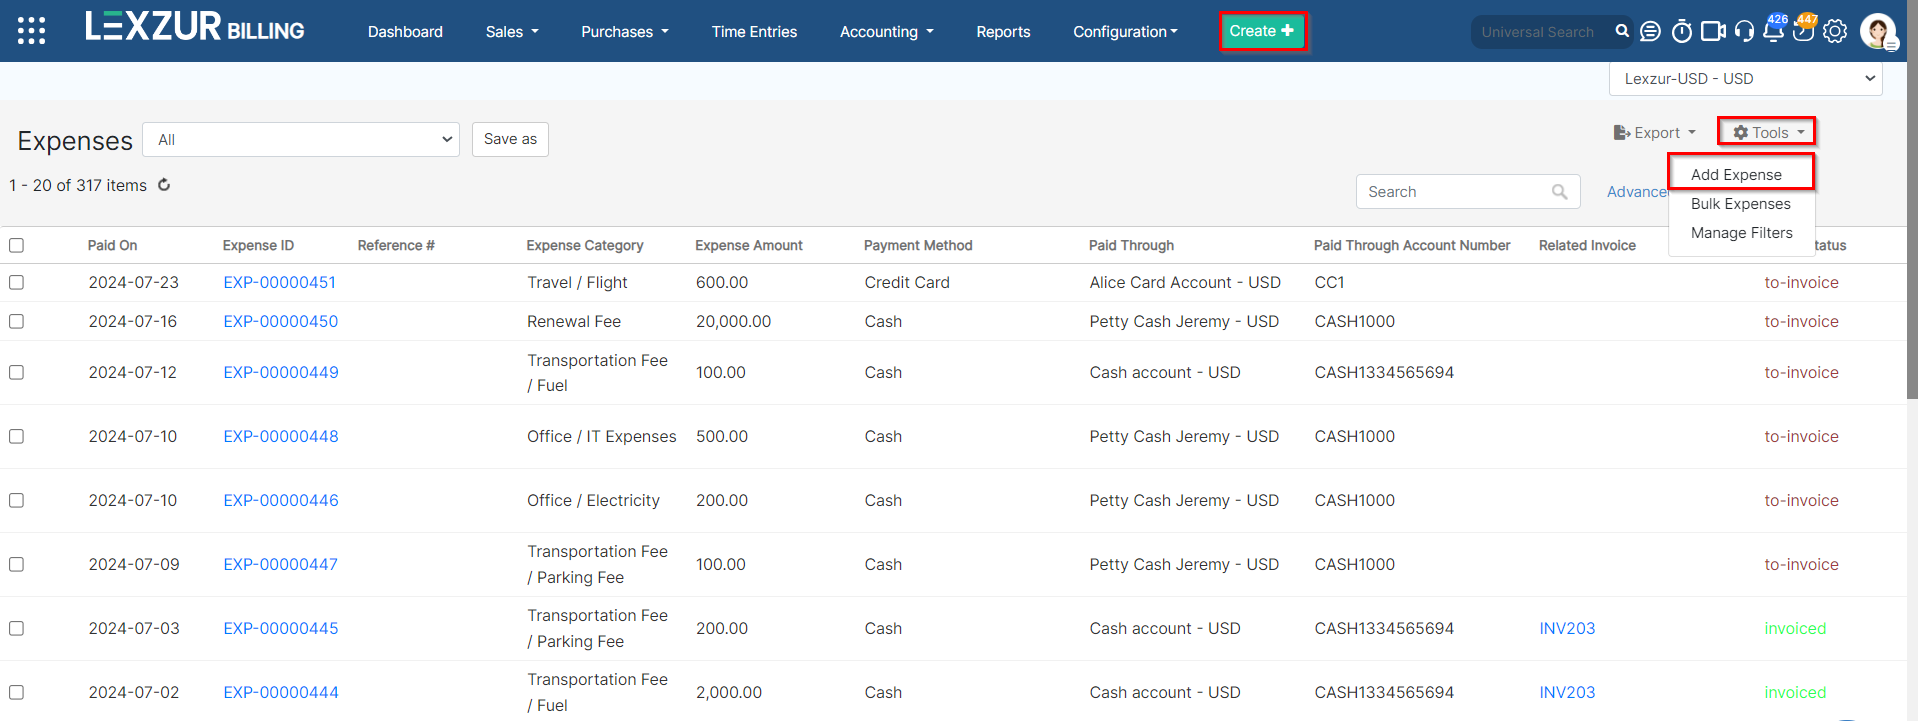
- Click Expenses → Add Expense
- Alternatively, add an expense via:
- The Tools button in the expenses grid
- The Quick Create button in the main menu
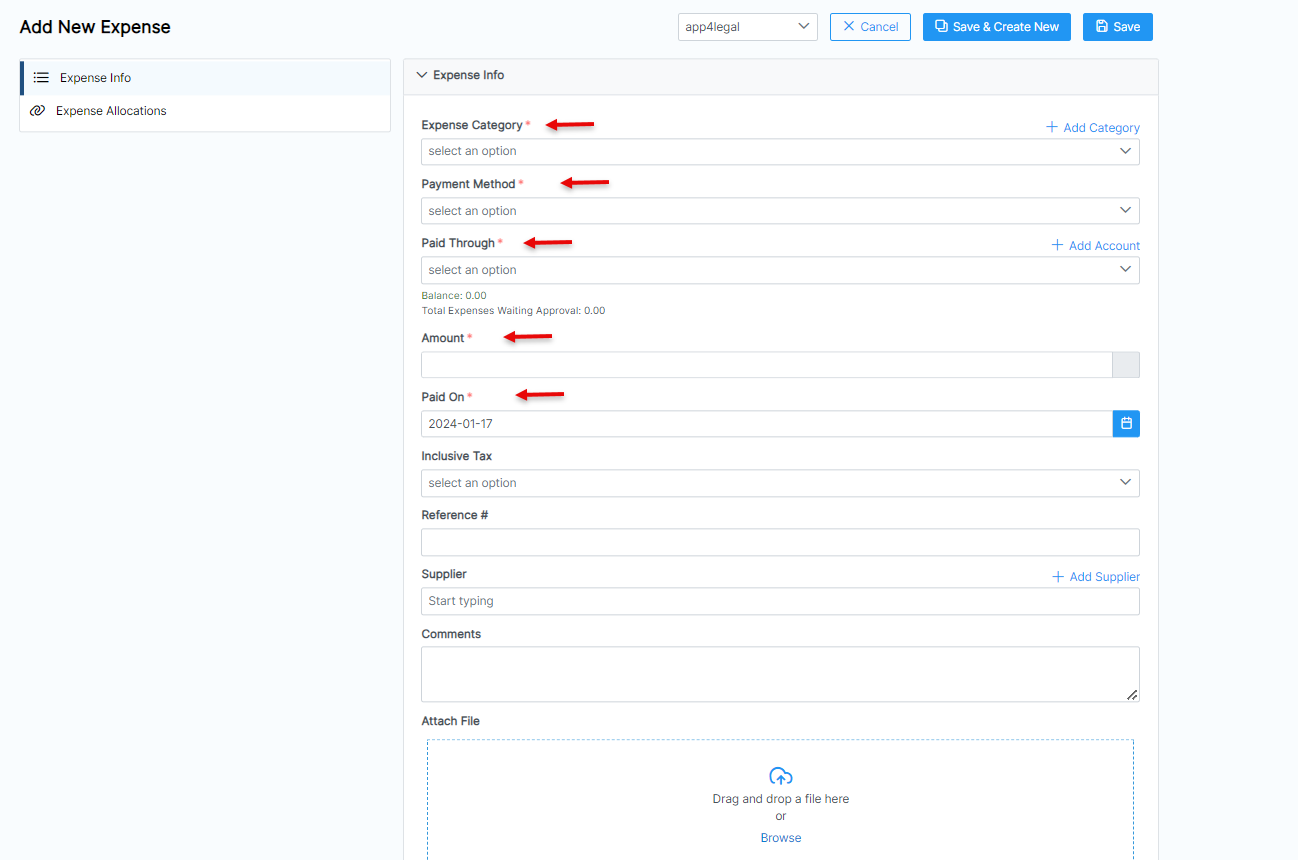
- Fill out the mandatory fields:
- Expense Category: Choose from the list of predefined categories set in the Billing Settings.
- Payment Method: The method determines the types of accounts that appear accordingly:
- Cash: Cash Accounts
- Credit Card: Liability of type Credit Card Accounts
- Cheque & Bank: Bank Accounts
- Online payment: Bank Accounts and Credit Card Accounts
- Other: Cash, Bank, and Credit Card Accounts
- Paid Through Account: The Account that appears as per the Payment Method. Accounts can be added on the fly via the Add account hyperlink.
- Amount: The paid amount.
- Paid On: date of the expense payment.
Additional Information:
- Tax, Reference Number, Supplier, Comments, or Attachments (such as receipts or supporting documents)
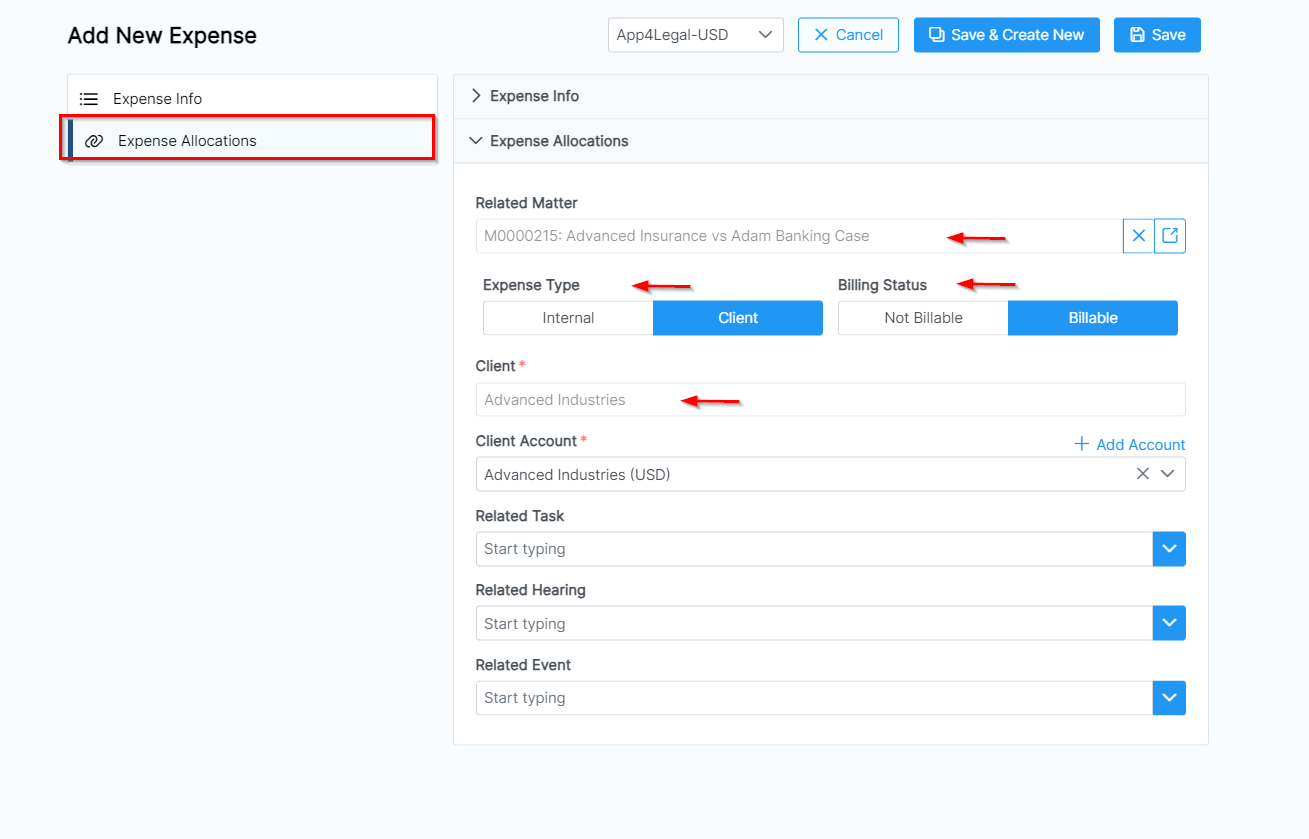
- Expense Allocation: Link the expense to Matters, Contracts, Tasks, or Hearings
- Client-Related Expenses:
- Specify whether it is billable or non-billable
- Assign it to a client account if applicable
Managing Expenses from the Expenses Grid
All recorded expenses are listed in the Expense Grid, accessible via:
Purchases → Expenses → List Expenses
The Expense Grid allows you to:
✔ Track & manage recorded expenses
✔ Search & filter using advanced search
✔ Generate reports
✔ Add bulk expenses
Each expense displays amount, status, related client account, and more.
Actions from the Expenses Grid
Using the settings wheel next to each expense, you can:
- View/Edit expense details
- Change billing status
- Approve, review, or cancel expenses before invoicing (based on admin approval settings)
- Open the expense page for further actions
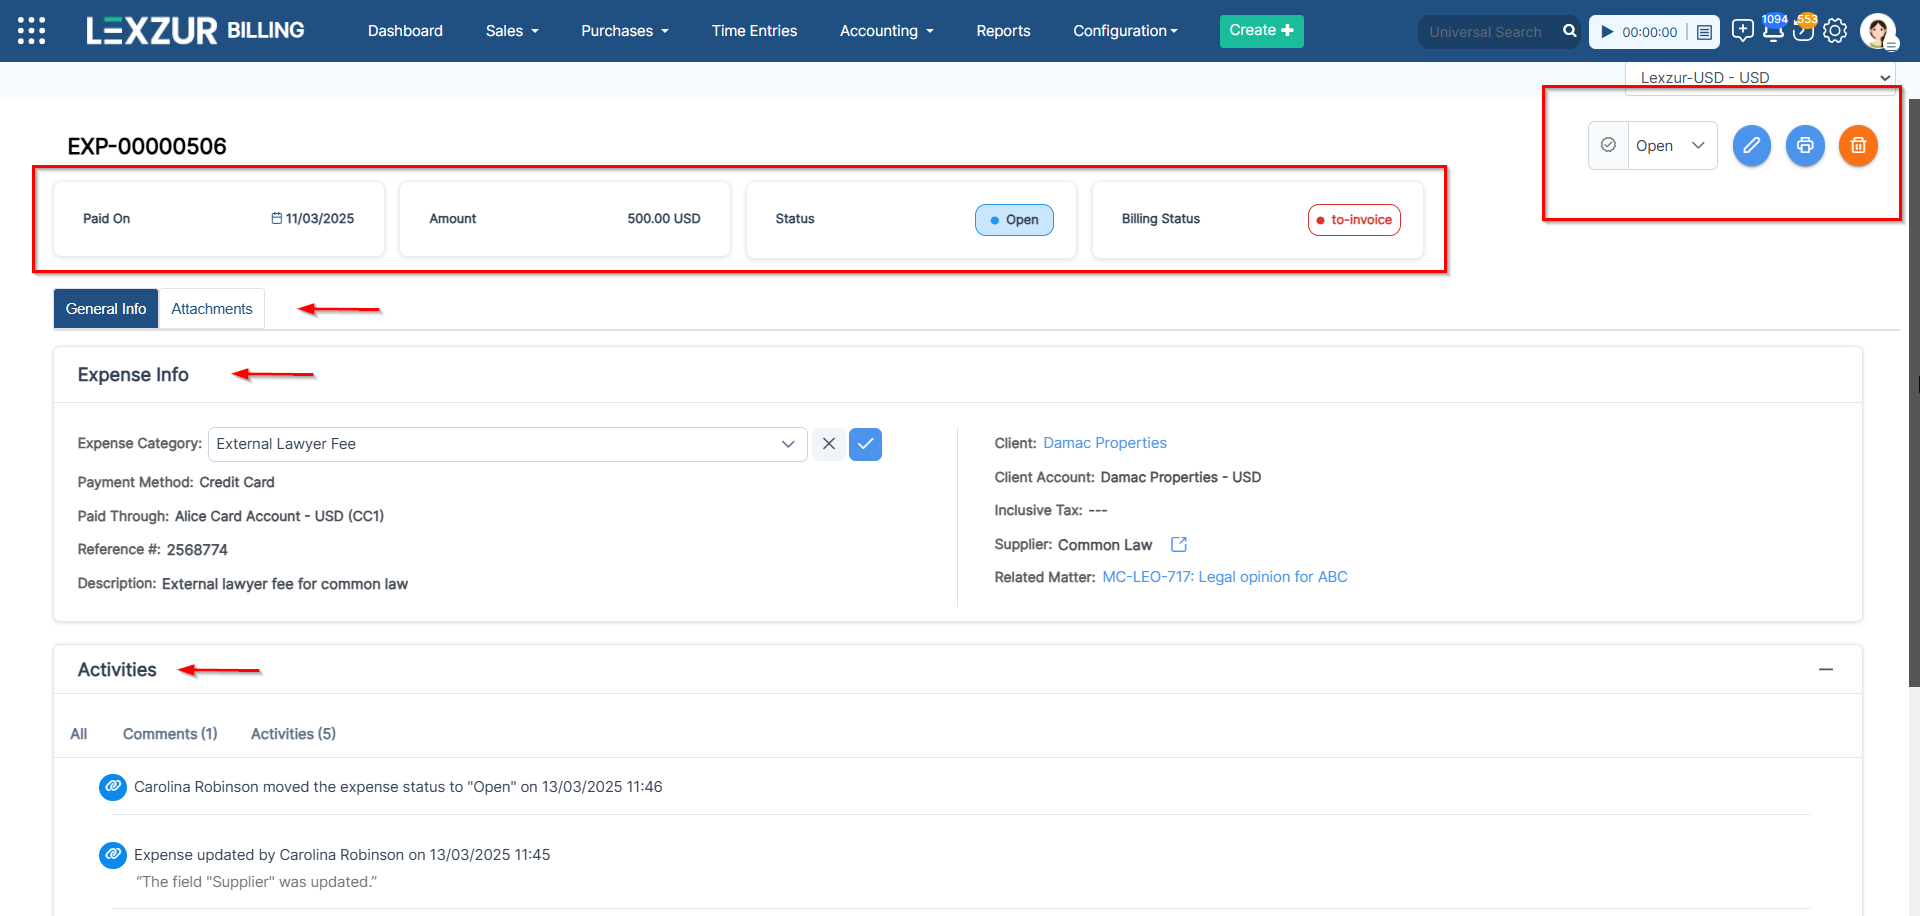
Expense Page
The Expense Page provides an overview of:
- Details (client name, amount, status, billing status)
- Attachments, Comments & Activity History
From this page, you can:
- Edit, print, or delete expenses
- Use inline editing for quick updates to fields like Category, Reference Number, Supplier Name, and Description
Approved expenses cannot be edited unless the status is changed to Open, Cancelled, or Needs Revision
- Change status via the dropdown menu (Open, Needs Revision, Approved, etc.)
- Add comments to communicate updates or notes
Invoiced and Reimbursed expenses can not be edited or deleted.
Reimbursed Expenses are expenses that are invoiced and the related invoice has been paid
For more information about LEXZUR, kindly reach out to us at help@lexzur.com.
Thank you!






This page has no comments.