Objectives
- Create Contract from template
- Upload Contracts/DocumentsGenerate a contract in the database
Steps
You can add Contracts to App4Legal through the quick Add button To add a new contract/document, click on the quick Create button in the main menu of the application.

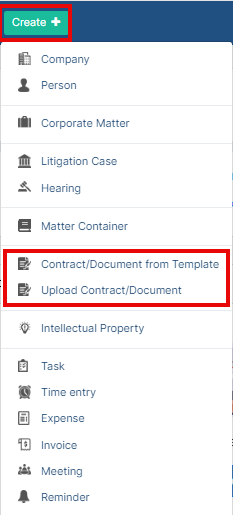
We have two options to generate a contract:
Create a contract/document from a questionnaireTemplate
Create/Upload a new Contract/document

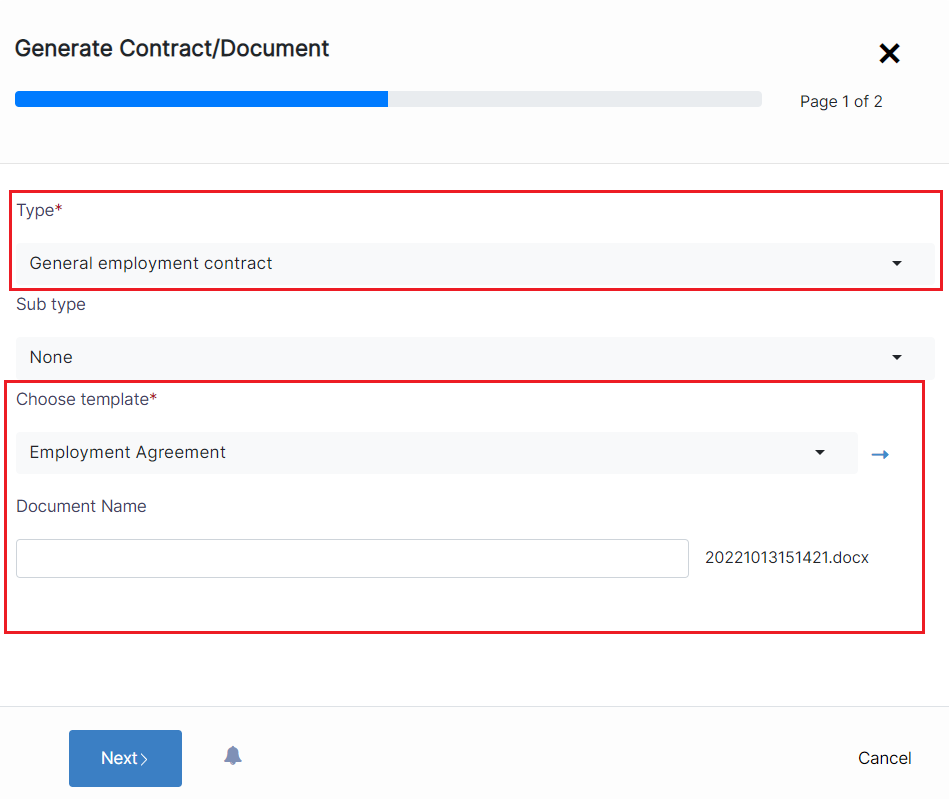
- If you choose "Create contract from a questionnaireContract/Document from Template", you will be redirected to a page where you have to choose the type of the contract and choose the a template based on this contract type, enter the document name and then press on the next button.

- .
Anchor contrafromtemplate contrafromtemplate
On the following page, give this contract a name, and start filling in the questionnaire.
| Tip |
|---|
These templates could be configured from the settings. Learn how to create the predefined templates here. |
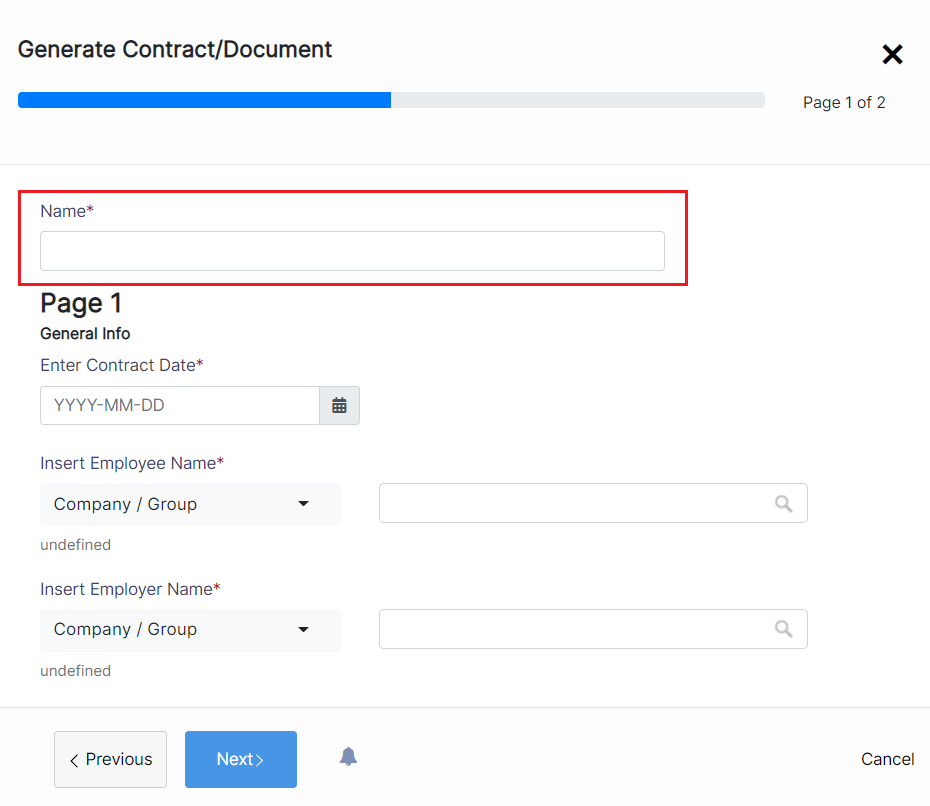
The number of these variables and pages depends on the type of agreement and its related template.
Once done, you will be directed to the page of the contract you've created where you can take further actions Fill in the data and press on Submit. The template data will be configured from the settings.
- If you choose "Create/Upload a new Contract/Document":
Anchor uplaodcontra uplaodcontra
The information The Add form of a Contract has the basic data that needs to be inserted.
The mandatory fields are the ones in red only: type, name and requester.
- Type : A customizable drop-down list to choose the type of the contract
- Sub type: A customizable drop-down list to choose the sub type of the contract
- Name: The name is the name of the contract
- Description
- Contract Value: A value of Contract and a field with all the currencies
- Requester: the person who requested this contract
- Select the country, the applicable law which a customizable list, the parties with their categories, Dates such as Contract Date, Start Date, and End Date. The Contract Date should always be greater than the Start Date. The End Date is always greater than the Start Date.
- Renewal: A defined list that can be managed in the Settings
- Reference number: It is the internal numbering of a contract. This is the firm's reference to the file number of the contract.
- Assigned Team: Select the Team that will be working on this Contract . You can create multiple teams in the application to reflect your workplace. By default, all Users belong to the Team called All Teams.
- Assignee: The App4Legal user who is assigned on this Contract who compulsorily has to belong to the above chosen Assigned Team.
- Contributors: Users from legal team.
- Authorized Signatory: the app4legal user who is authorized to sign contract
- Priority: A defined list that is hardcoded.
After filling all the information needed click on Submit.


filled out here could also be referred to a predefined form.
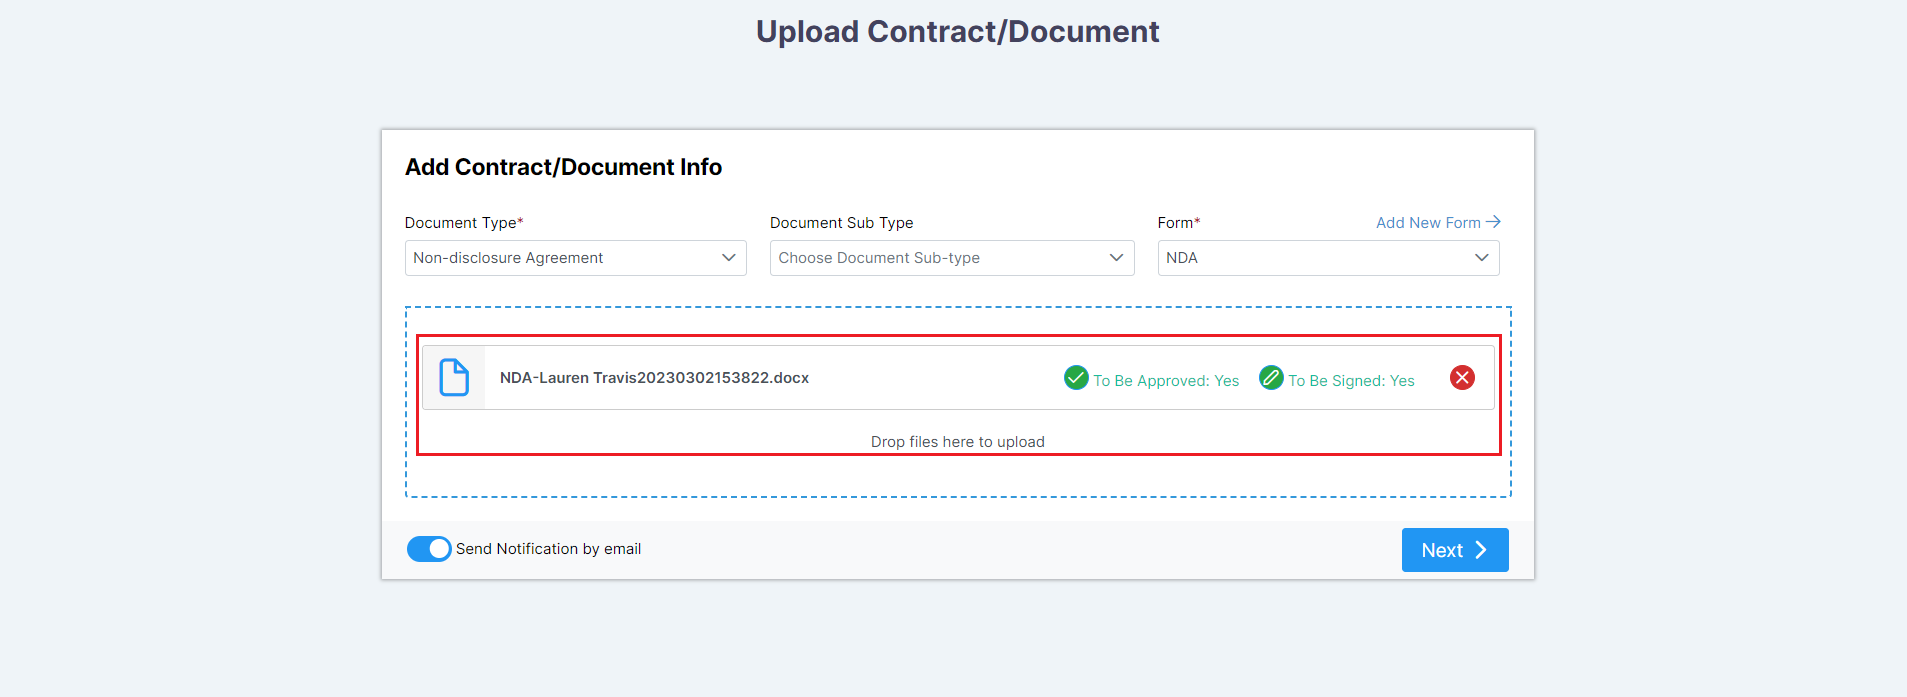
So, specify your Document Type, Sub Type if any, and choose the predefined Form.
And upload your contract/document as well.
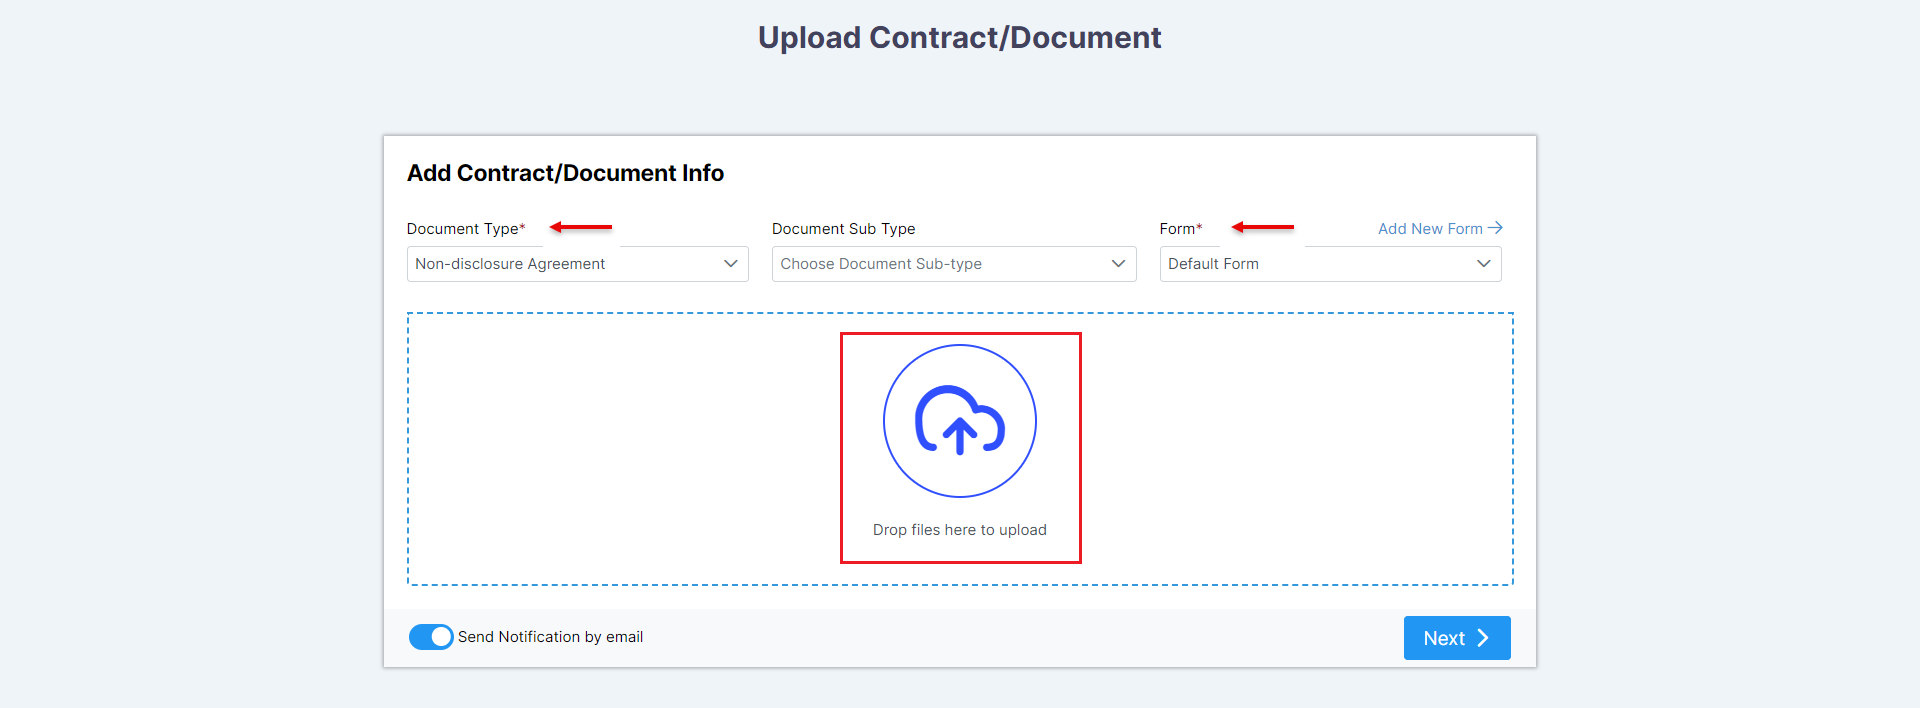
| Note |
|---|
There is a Default Form that could be used in case you haven't created your own form. |
After adding your document, you can set the approval and signature permissions on the fly.
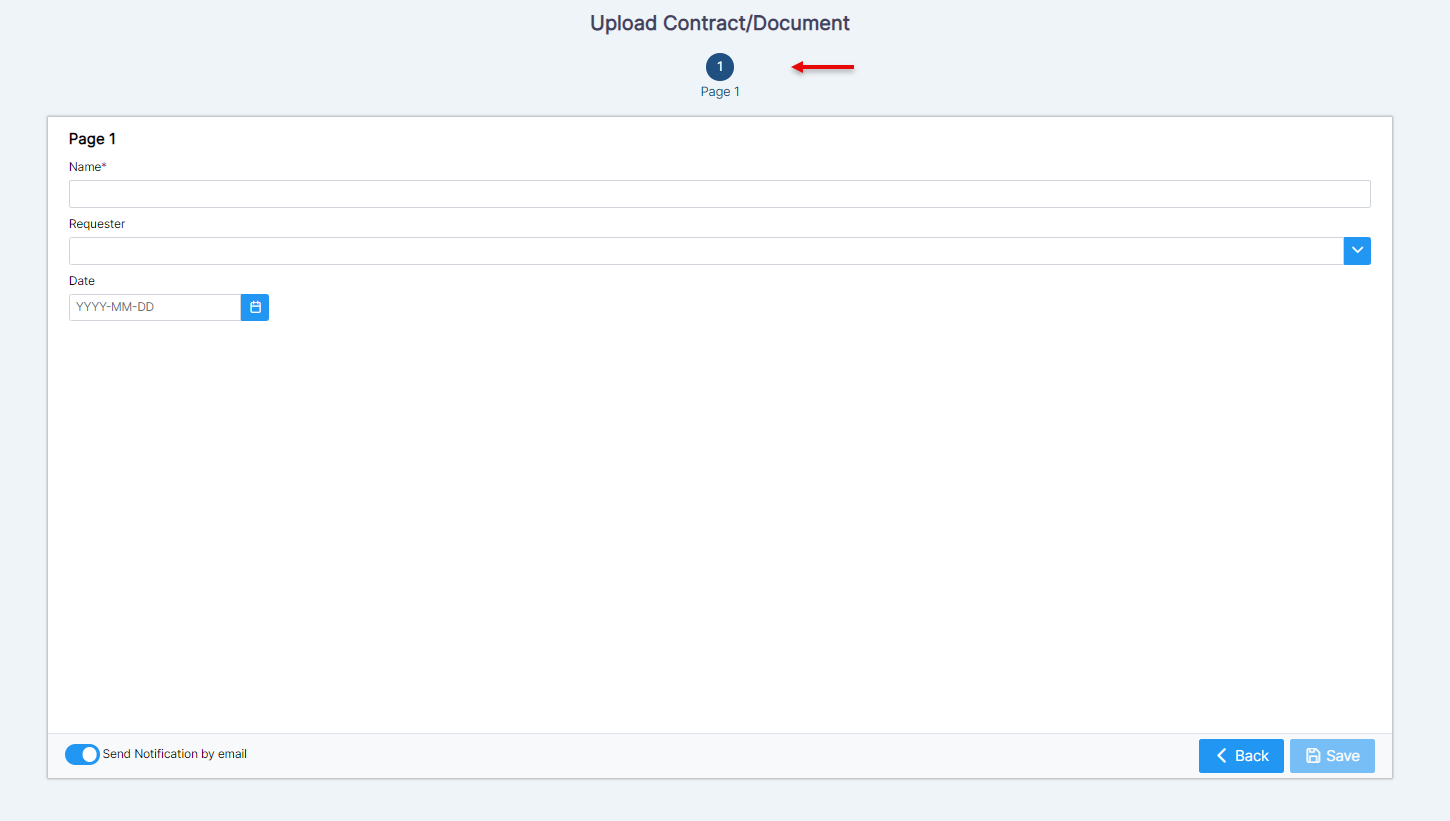
Now, start adding the contract information, such as the Contract Name, Parties with their categories, Contract Type, Requester, Date, and so on.
The number of these variables and pages depends on the type of agreement and its related form.
| Tip |
|---|
Learn more about how to create Forms here. |
Once done, you will be directed to the page of the contract you've created where you can take further actions.
For more information about LEXZURFor more information about App4Legal, kindly reach out to us at help@app4legalhelp@lexzur.com.
Thank you!