Objectifs
- Configurer l'intégration entre LEXZUR et
Objectives
- Setup the integration between LEXZUR and Adobe Sign
Steps
To set up the integration between Lexzur and Adobe Sign, you must first have a separate Adobe account and follow these steps:
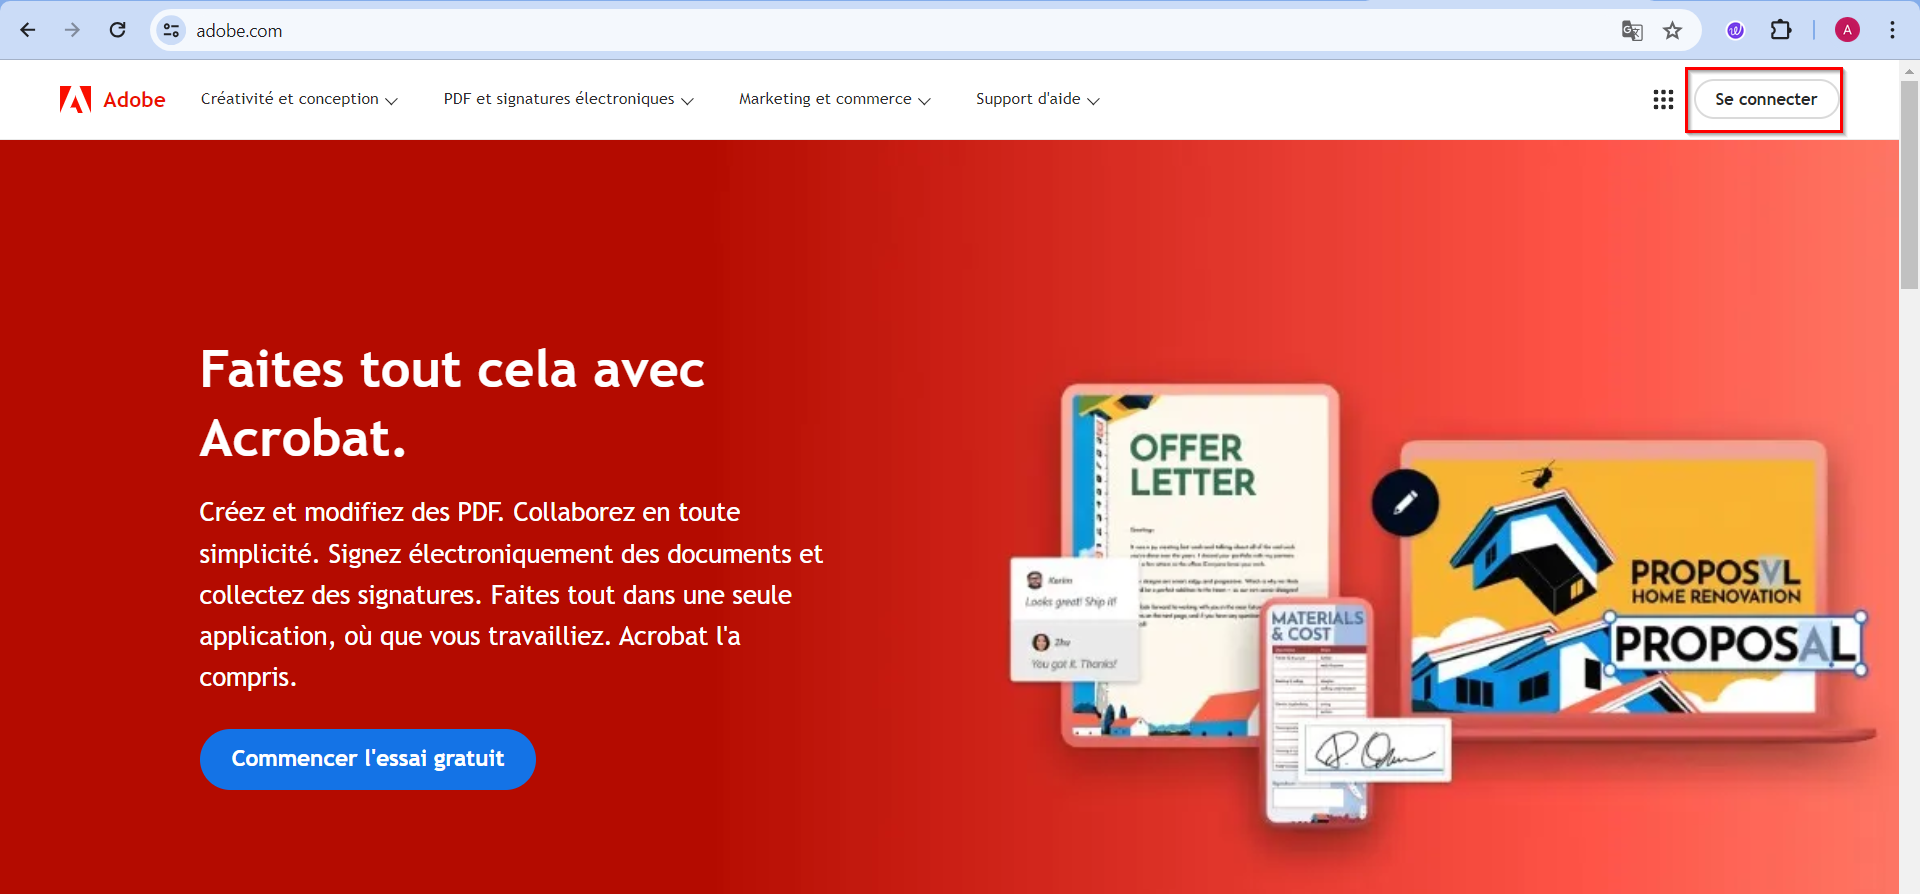
- Go to adobe.com and sign in to your account, or create a new account and use the free trial option.


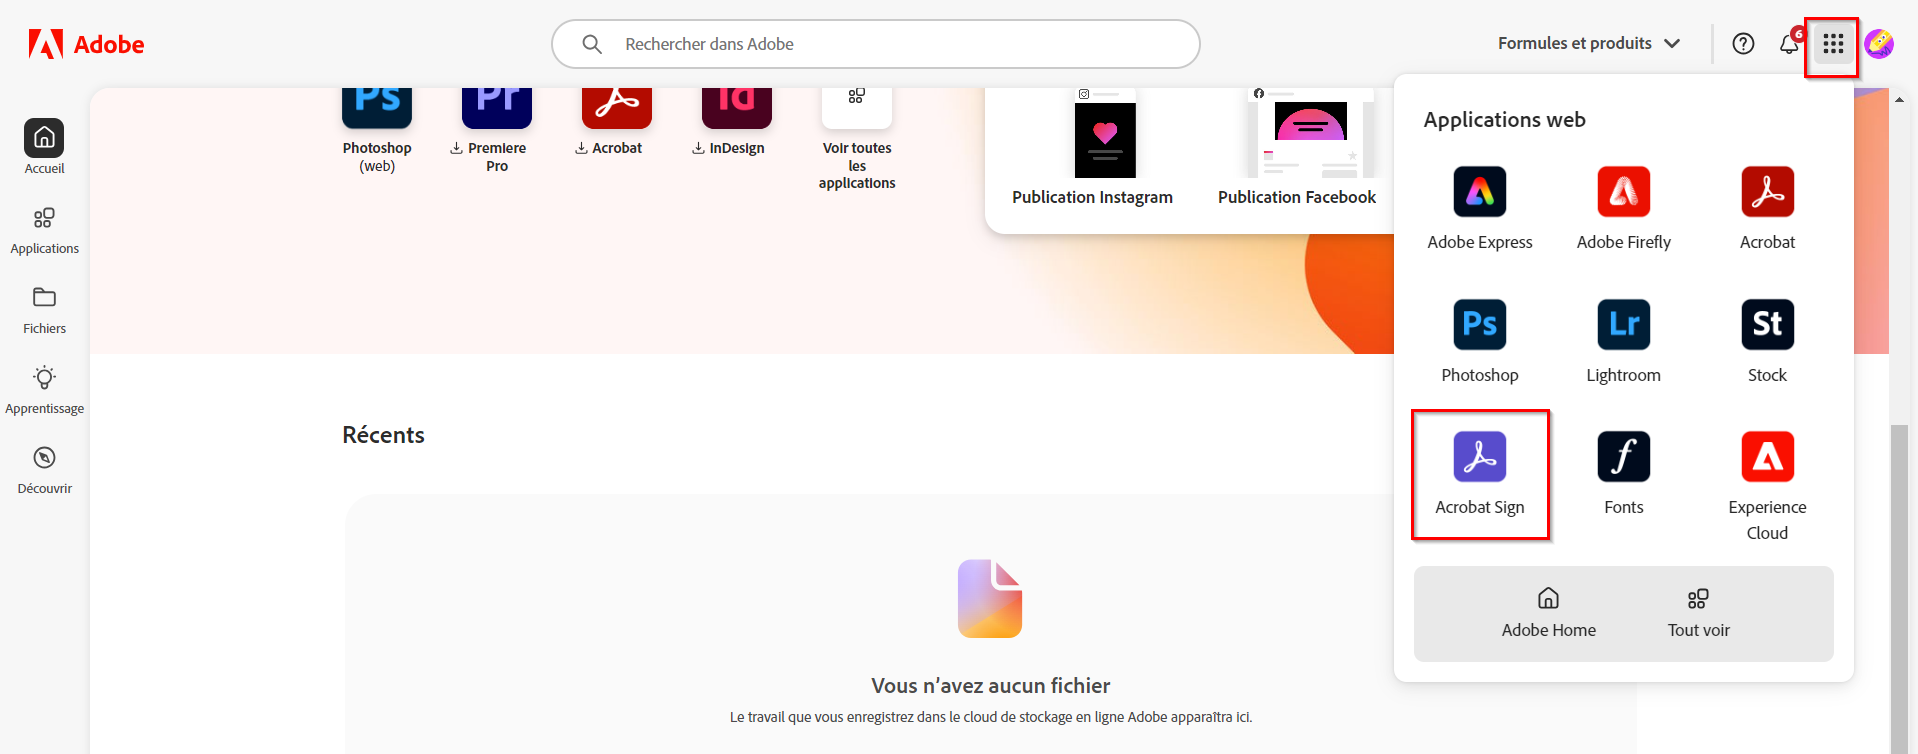
- After signing in to your Adobe account, you need to purchase Adobe Acrobat Sign, which will handle the digital signatures. Open the apps menu by clicking on the box icon in the top right corner of your account. Then, choose Acrobat Sign.

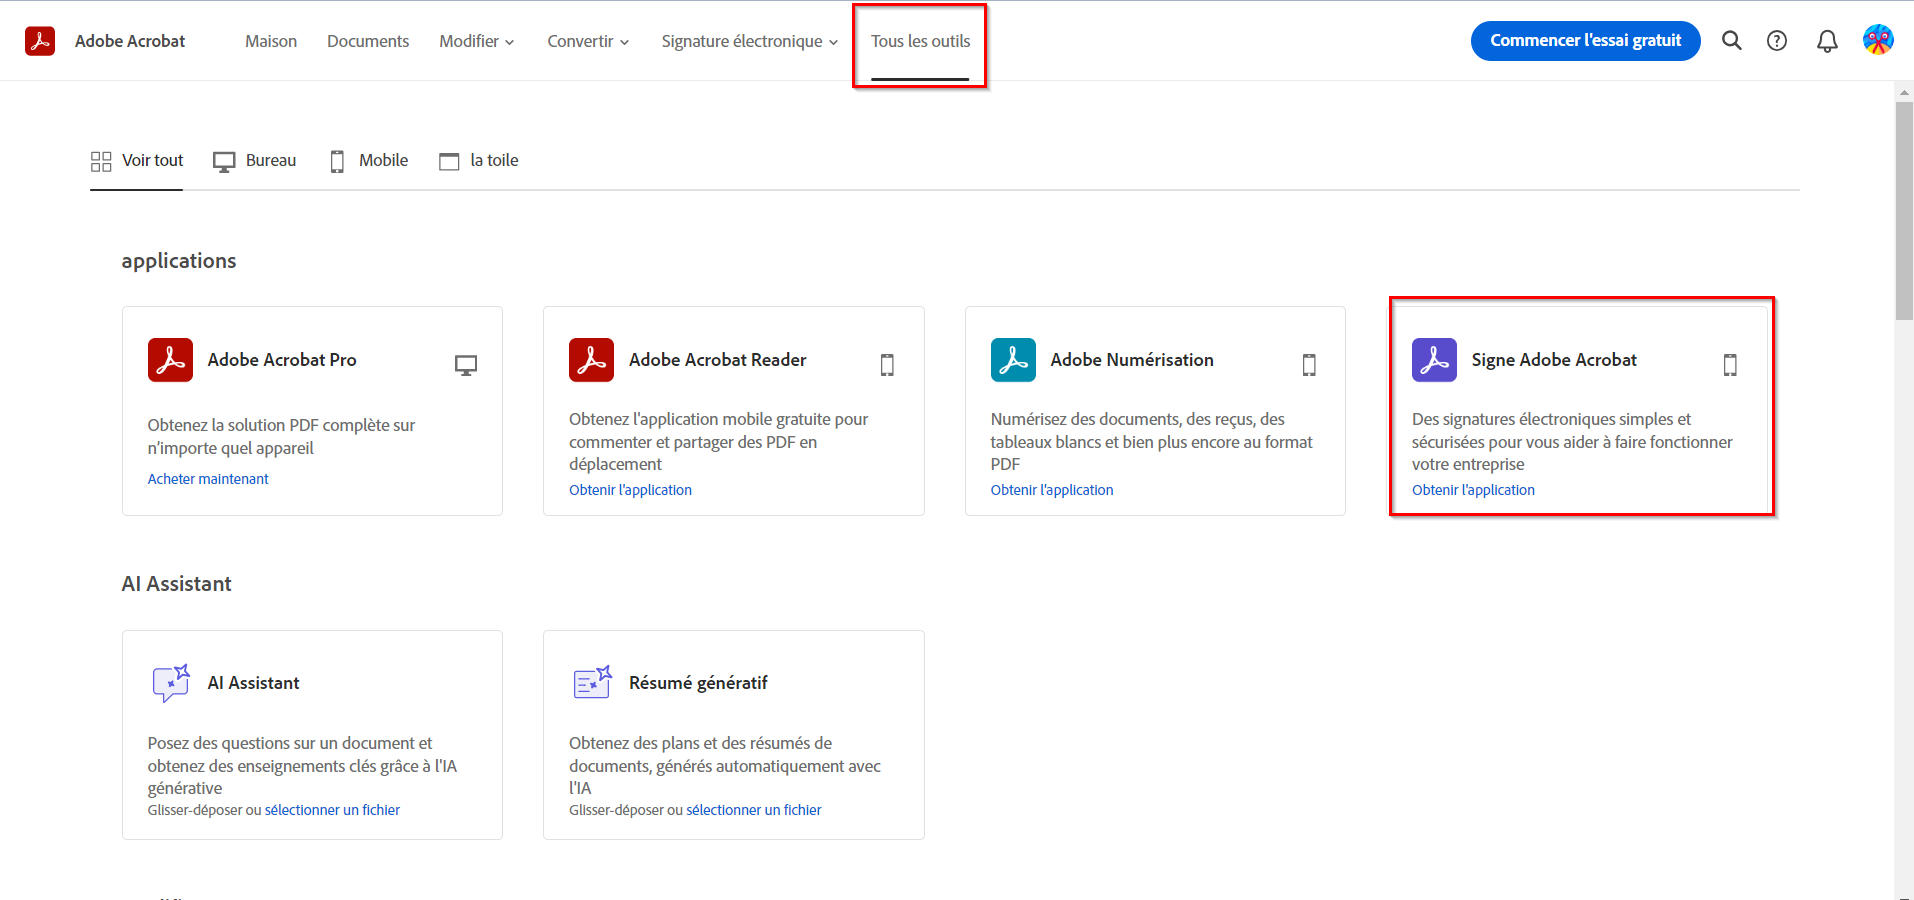
- Log in to your Adobe account and navigate to the "All Tools" tab. Select the Adobe Acrobat Sign app and click to Get it.

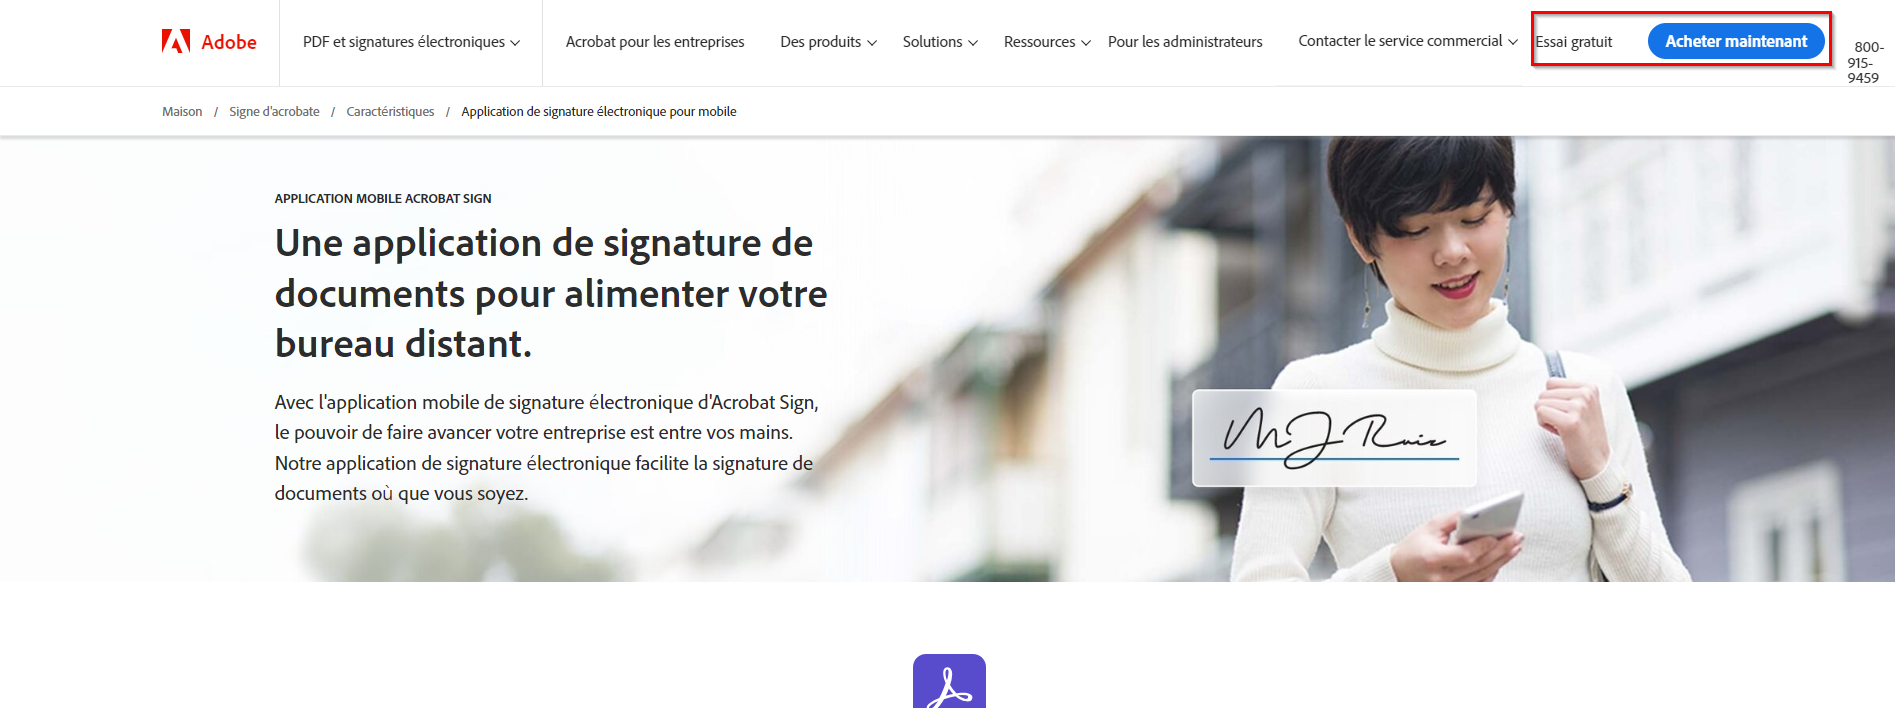
- Here, you can choose to purchase the app or start a free trial.

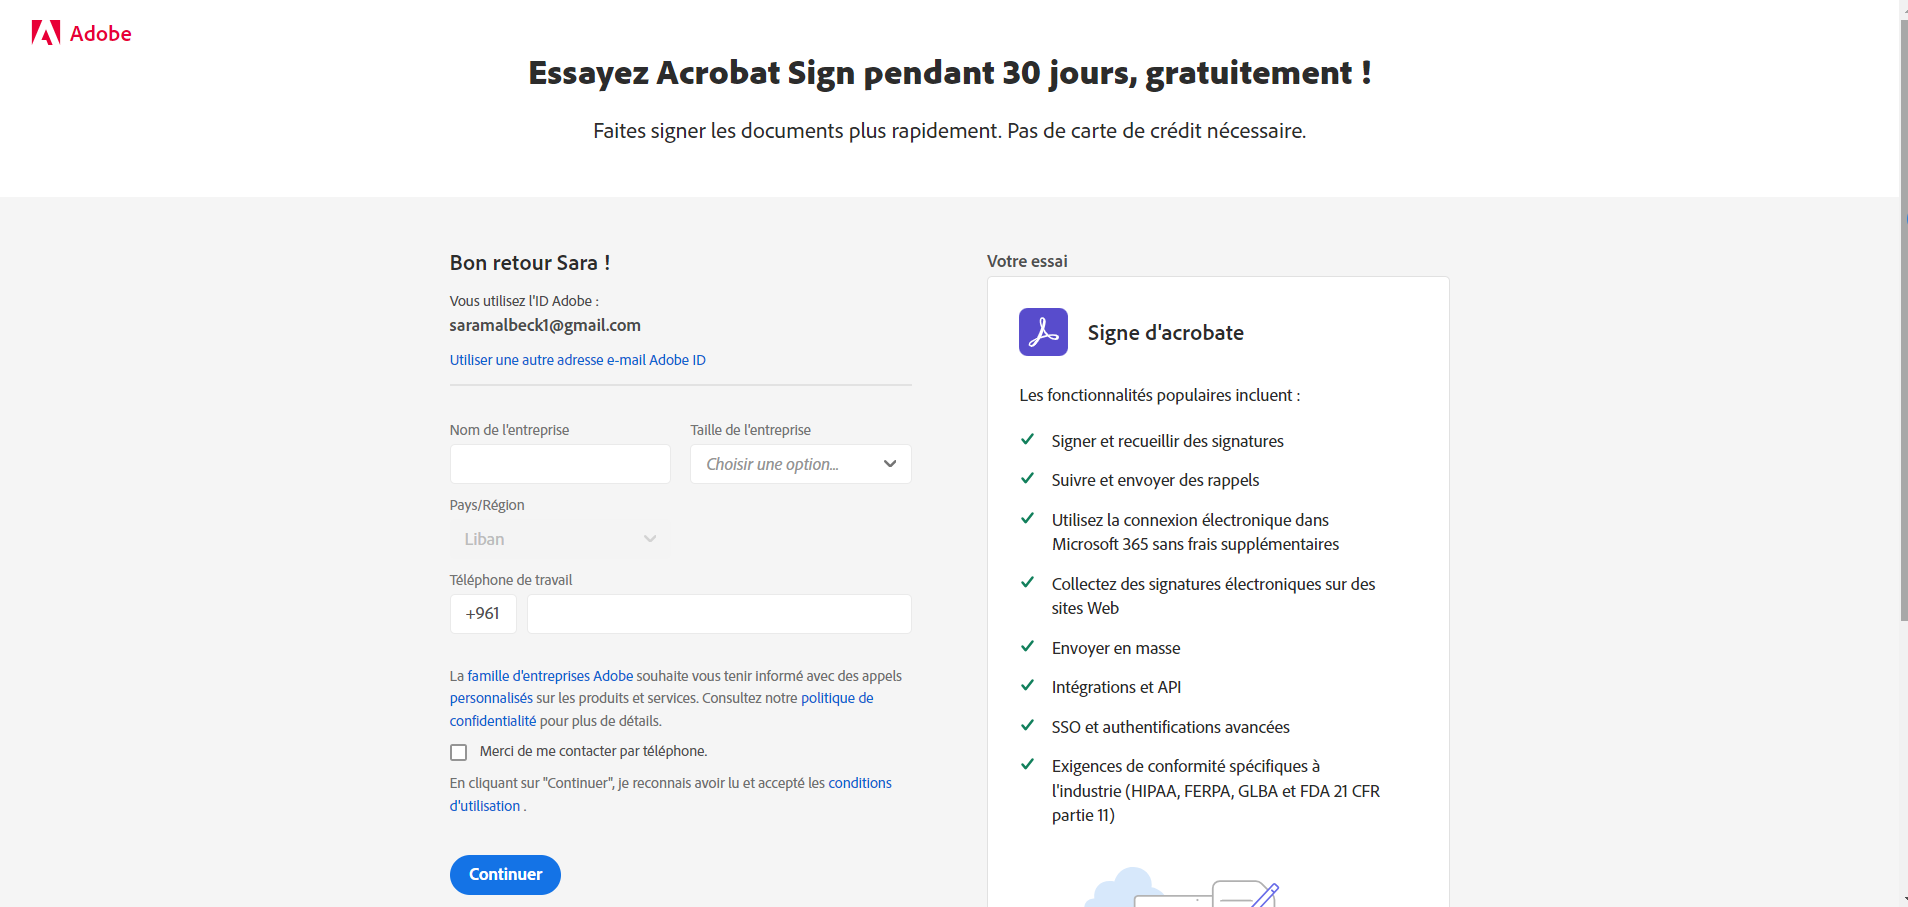
- Enter your company information to create the Adobe Acrobat Sign account.

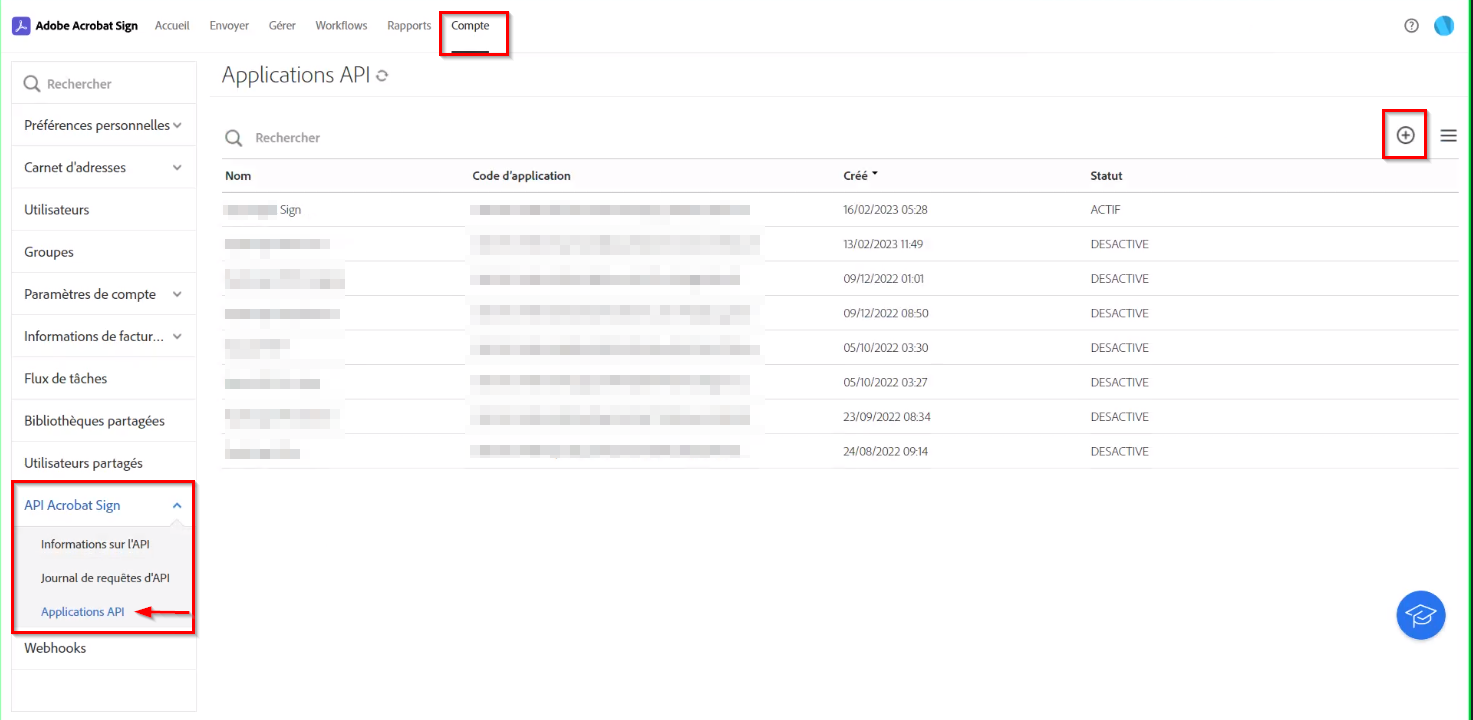
- From the "Adobe Acrobat Sign" Account, click on "Account" and select API Applications from the right panel

| Note |
|---|
| There will be a separate Adobe Acrobat Sign API application for every LEXZUR instance |
- Click on the plus icon to create a new API application in your Adobe Acrobat Sign account.

Etapes
Pour configurer l'intégration entre Lexzur et Adobe Sign, vous devez d'abord disposer d'un compte Adobe distinct et suivre les étapes suivantes :
- Allez sur adobe.com et connectez-vous à votre compte, ou créez un nouveau compte et utilisez l'option d'essai gratuit.
- Après vous être connecté à votre compte Adobe, vous devez acheter Adobe Acrobat Sign, qui gérera les signatures numériques. Ouvrez le menu des applications en cliquant sur l'icône en forme de boîte dans le coin supérieur droit de votre compte. Choisissez ensuite Acrobat Sign.
- Connectez-vous à votre compte Adobe et accédez à l'onglet "Tous les outils". Sélectionnez l'application Adobe Acrobat Sign et cliquez pour l'obtenir.
- Ici, vous pouvez choisir d'acheter l'application ou d'en faire un essai gratuit.
- Saisissez les informations relatives à votre entreprise pour créer le compte Adobe Acrobat Sign.
- Dans le compte "Adobe Acrobat Sign", cliquez sur "Compte" et sélectionnez "Applications API" dans le panneau de droite.
| Note |
|---|
Il y aura une application Adobe Acrobat Sign API distincte pour chaque instance de LEXZUR. |
- Cliquez sur l'icône plus pour créer une nouvelle application API dans votre compte Adobe Acrobat Sign.
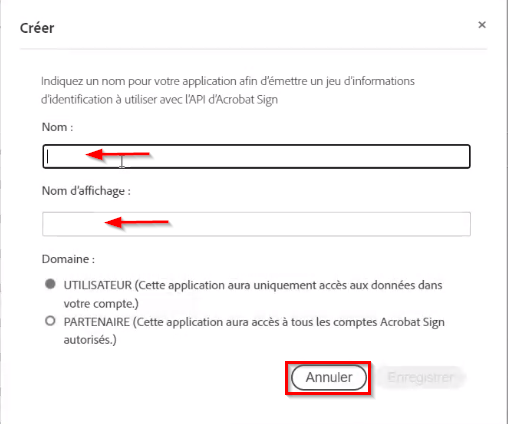
- Indiquez un nom pour votre application afin d'émettre un ensemble d'informations d'identification à utiliser avec l'API d'Acrobat SignProvide a name for your application to issue a set of credentials for use with Acrobat Sign's API.
- Après avoir créé l'application API, sélectionnez votre application et cliquez sur After creating the API Application, select your app and click on "Configure OAuth for Application".


- Renseignez l'URI de redirection Fill in the Redirect URI : https://adobe.app4legal.com/adobe/auth and the required scopes: et les champs d'application requis :
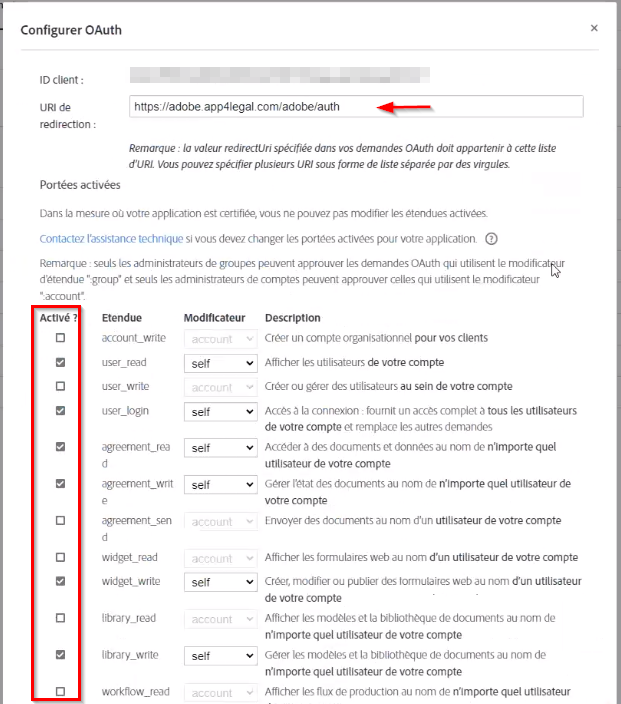

- user_login : self
- agreement_read: self
- agreement_write : self
- agreement_send : self
- widget_write : self
- library_read : self
- library_write : self
- webhook_write : self
- webhook_retention : self
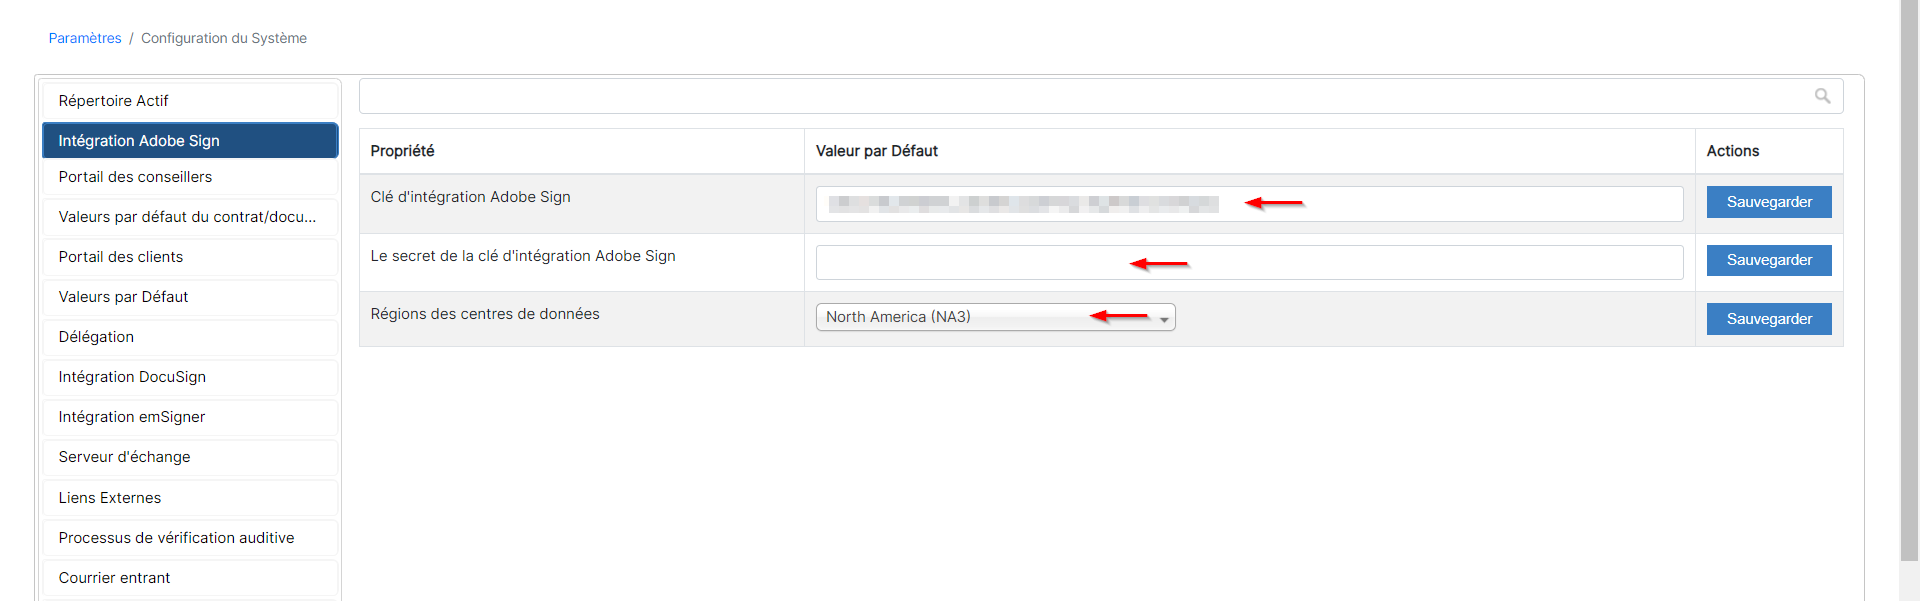
- Now, go to your LEXZUR instance, click on "System Settings", then "Setup & Configuration".
- Maintenant, allez dans votre instance LEXZUR, ouvrez les Paramètres, puis Configuration du Système.


- Select "Adobe Sign Integration" from the right panel, and add the Adobe Sign Client ID, and Adobe Sign Client Secret, and specify the Data Center Regions.

| Note |
|---|
You can find your data center region from the URI on the Adobe Acrobat account page.
|

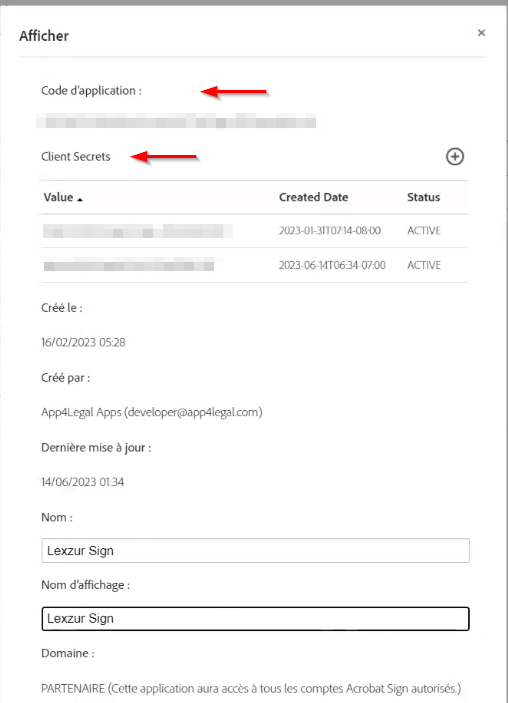
- The Client ID and Client Secret can be obtained from the Adobe Acrobat Sign API Application
- Once you click on the App you created click on View/Edit. This is where you can copy the Client Secret. The Application ID on this page refers to the Client ID.

- The Client ID can be also obtained from the Configure OAuth page.

Now that your Adobe Sign integration is complete, you can use it to sign contracts/documents.
For more information about LEXZUR, kindly reach out to us at help@lexzur.com.
- Sélectionnez Intégration Adobe Sign dans le panneau de droite, ajoutez l'ID du client Adobe Sign et le secret du client Adobe Sign, et spécifiez les régions du centre de données.
| Note |
|---|
Vous pouvez trouver la région de votre centre de données à partir de l'URI sur la page du compte Adobe Acrobat.
|
- L'identifiant et le secret du client peuvent être obtenus à partir de l'application Adobe Acrobat Sign API.
- Une fois que vous avez cliqué sur l'application que vous avez créée, cliquez sur View/Edit. C'est ici que vous pouvez copier le secret du client. L'ID de l'application sur cette page fait référence à l'ID du client.
- L'identifiant du client peut également être obtenu à partir de la page Configurer OAuth.
Maintenant que l'intégration d'Adobe Sign est terminée, vous pouvez l'utiliser pour signer des contrats/documents.
Pour plus d'informations sur LEXZUR, veuillez nous contacter par mail à help@lexzur.com.
Merci de votre attentionThank you!