...
You will be redirected to the Add New Invoice page, where you need to go through some steps.
- Client:
The first step is Client related. Therefore, specify the Client's Account, and choose the invoice template from the predefined list of templates.
...
The client's details such as the address, Tax number, bill to address, and so on, are all fields retrieved automatically from the contact's page, and you can edit them on the fly.
- Matters:
The next step is to link matters along with their corresponding time logs, expenses, and expenses bills to the invoice.
Note: Skip to Items directly if you don't want to link matters
...
Additionally, you can search by the Matter Name, Practice Area, Assignee, and Status.
Import the Time Logs, Expenses, and Expenses Bill items related to the matters you selected, then submit and continue.
You can also filter the time logs by date before selection.
Note: You have the option to add Tax or Discount at the level of all the imported time logs.
...
- Items:
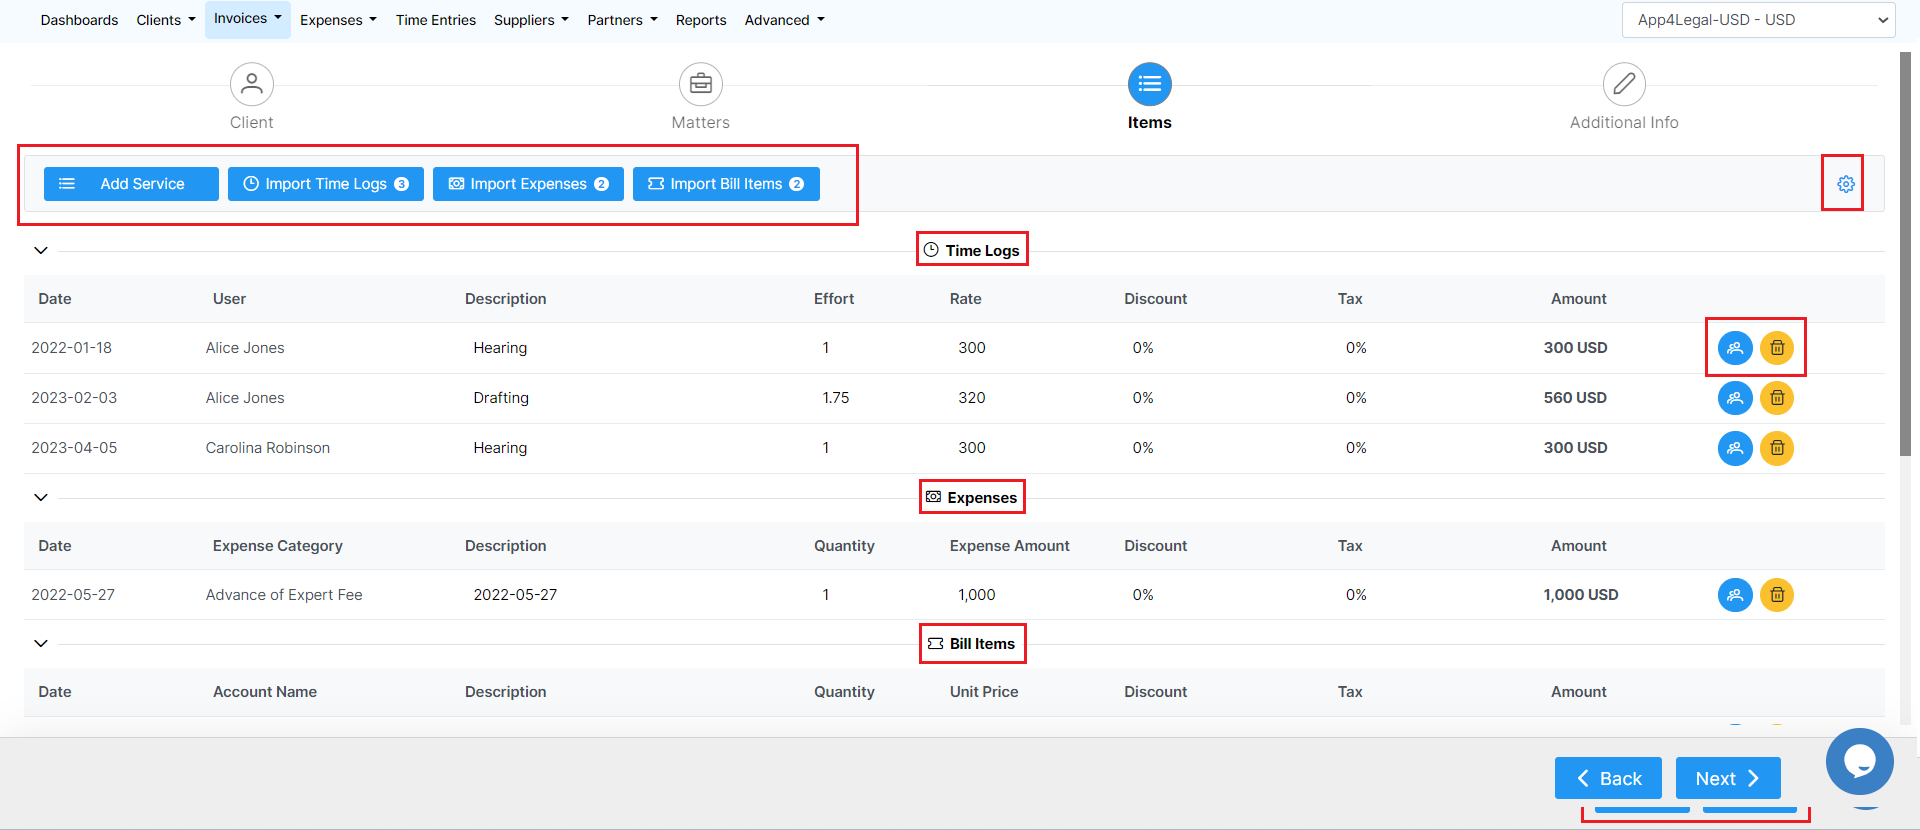
In the third step, you will view all imported time logs, expenses, and expensesBill items, or you can add additional services.
At the level of each added item, you can edit their details, delete lines, or add partner shares.
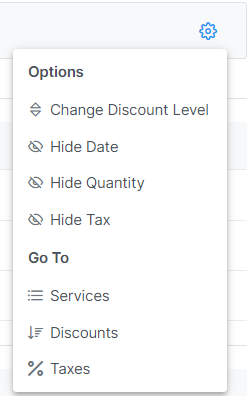
Moreover, the action wheel on the top right, allows you to do further modifications such as changing the discount level, therefore, you can perform discounts on the level of each item in the invoice, on the level of the invoice total amount before tax, and on the level of the invoice total amount after-tax. This advanced option will allow more flexibility when invoicing your clients.
To add a new service you can simply choose from a list of predefined services and you can add a new one on the fly.
...


